If you are on a really tight budget but still want to try out your hand at macro photography, then this one is definitely for you.
Reverse lens photography is a makeshift, DIY technique designed to use your existing lens with your camera to shoot incredibly small macro subjects.
I know what you are thinking now, “Any lens..really?”
Ah… yes!
You can start macro photography right this instance with exactly the camera gear you own. NO purchase necessary.
Seriously, how many times has that happened in your entire photography career?
The idea is so simple to understand and execute that there cannot be a reason NOT to try this out.
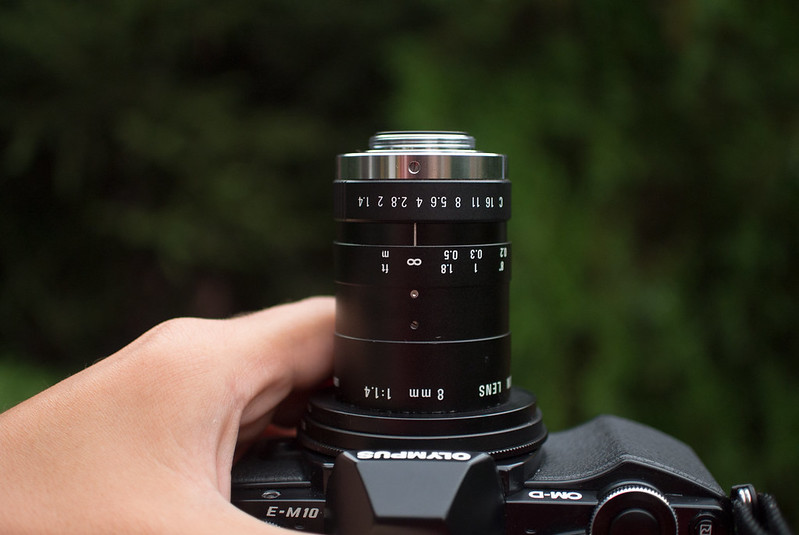
All you got to do is unmount the lens you have mounted on your camera right now and then attach it back front side back.
It should look something like this:

I understand there are some questions popping up in your mind right now. So let’s deal with them one by one.
How To Mount The Lens When Reversed?
Since neither the designer of the lens nor that of the camera were aware of our towering intellect, they made no provisions at all to actually attach the lens the other way round.
But not to worry. There are two easy ways to fix this.
Just Hold The Lens Tightly
This is not optimum, but it is the quick and dirty way to do this.
To shoot a good macro image with the camera lens duo using the reverse lens technique, you can just flip the lens the other way and hold it together with the camera in place.
Try and cover the opening of the camera as much as you can, so as to not let any stray rays of light inside.
Again, this will work but it might be quite a chore to hold the lens this way for long.
Not appealing to you much, this one?
Let’s look at the next option then.
This should make much more sense.
Reverse Mount Adapter
Yes, you read that right! Some people actually made an adapter to help mount the lens backward.
Bless them.
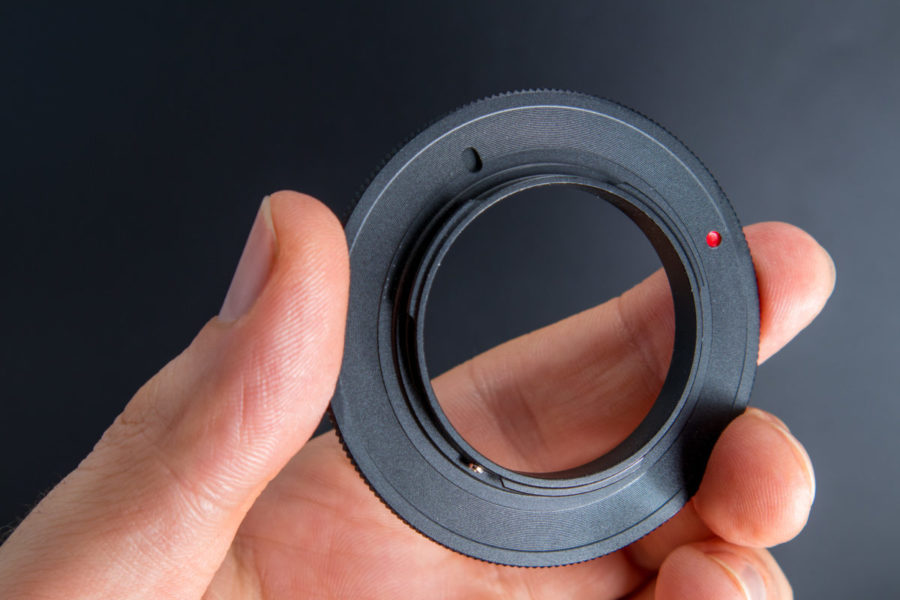
The adapter is a simple piece of plastic which has a male filter thread on one side and a male lens mount (like the one at the back of the lens, the actual mount) on the other.
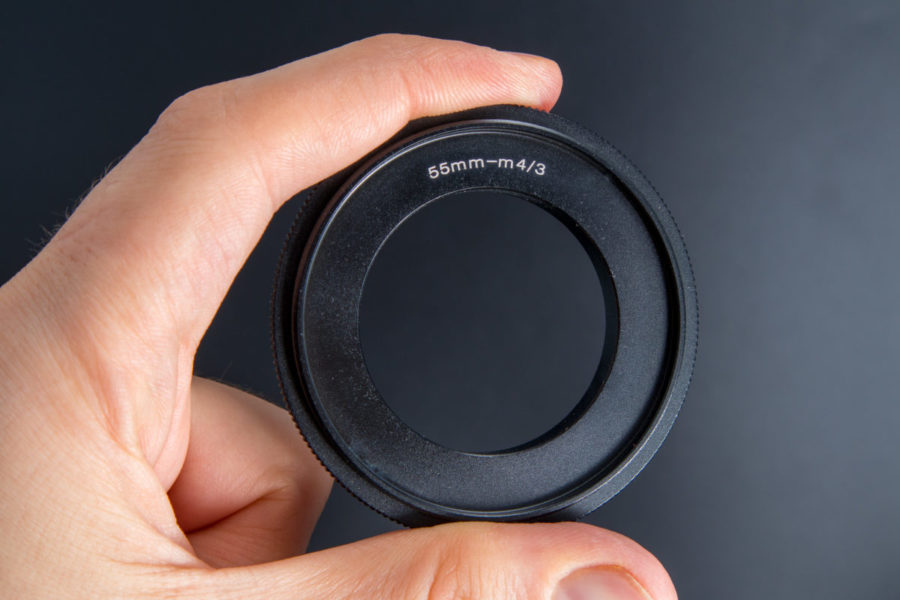
The idea is simply to use the filter threads on the front side of your lens to mount it to your camera.
All lenses have female threads at the front outer periphery. This is generally to help attach various types of lens filters such as Neutral Density filter (ND filter), Circular Polarizing Filters (CPL), etc.
Once you screw in the reverse lens adapter to the front of the lens, it mounts just like a regular lens to the camera.
How To Choose The Correct Reverse Lens Mount?
To be very honest, no reverse mount I have seen is very well built. They are all plastic, unlike the actual ones at the back of our lenses and kinda flimsy.
But you are not going to use it for shooting a war anyway, so it really doesn’t matter that much. As long as it holds the camera and the lens together, it’s fine.
However, having said that, you need to know two crucial things to get the correct adapter that would fit both your lens and the camera.
- Your camera body’s lens mount type
- Filter thread size of the lens you intend to use reversed
You probably already know the first one.
To find the filter thread size, you can look behind the lens cap. It is nearly always written on it. Failing that, you should find it written either on the lens barrel itself or on the front element of the lens.
For me, I need a Nikon F type mount and a thread size 58mm for mounting my trusty little Nifty Fifty, Nikkon 50mm, f/1.8 G lens.
Which Lens To Pair?
Like I said at the beginning, you can use absolutely any lens you have at your disposal.
It really doesn’t matter. The whole thing is a hacked-together system anyways.
And if you are willing to ‘free lens’ a bit (read: hold the lens tightly against the camera without actually mounting it), you can literally use any lens with any camera.
Prime lenses, Zoom lenses, Cine lenses, you name it. It works.
Okay, about that.
With prime lenses, like the ever-popular 50mm, Plastic Fantastic or the travel-friendly 35mm, you will have no zoom to play with.
In any case, once you attach the lens reversed, the zoom of the camera works in a peculiar way. Obviously!
But one thing remains constant and that is the stellar image quality of the primes. Since they have so little moving parts in them, the optical quality of the images they produce is fantastic.
As far as the actual focal length of the lens goes, this is what you need to know.
- Wider the focal length of the lens,m magnified the image it creates when reversed and vice versa.
This means that if you decide to use the 18 to 55mm kit lens, you will get an image which is much more magnified when using it at 18mm as compared to the image produced at 55mm.
This goes hand in hand with the Depth Of Field arrangement too.
For the same aperture value, the depth of field is inversely related to the magnification of the subject being photographed.
So, for example, if we take the aperture value to be constant at f/5.6, a lens camera duo producing 1:1 magnification will have more depth of field to play with than a lens camera pair which has a magnification of 3:1.
Again, higher the magnification, lower the depth of field for the same aperture value.
In simple words, you can turn your humble 18 to 55mm kit lens into a super macro monster lens.
Just in case you also have a 50mm or a 35mm prime lens lying around, try them out too. They really do produce images that could rival actual dedicated macro lenses worth hundreds of dollars.
Careful Now!
Now that you have managed to mount the lens backwards onto your camera, the essential electrical contacts and the fragile mechanical parts are all exposed.
These delicate parts which are generally protected inside the camera are now hanging outside and on the receiving end of bad news.
So be extra careful that you do not accidentally bump into things.
Actually, as I come to think about it, you could use the rear element cap of the lens for the time being as the lens hood. That’s a better idea.
Baffled Camera
The actual lens mount of any lens is not just a physical coupler.
Apart from connecting the lens to the camera, physically aligning the lens to the camera sensor, and creating a proper seal (which in some cameras even prevent moisture from getting in), it also has many other crucial functions.

If you ever notice carefully, there are electrical contacts on the mount itself. They serve two primary functions:
- Synchronize Autofocusing
- Control Aperture Value
As you already know, the autofocusing system is always located in the camera body. Now, depending on the type of camera body you use, it could have a separate autofocusing module altogether (like in most DSLR cameras) or sensor-based (generally found in Mirrorless bodies). No matter what it is, it is always the camera that determines the autofocus.
To focus properly, elements inside the lens have to move. So you see, it is imperative that the camera body and the lens talk to each other.
The camera directs the lens about how to move its internal optical elements and the lens abides. Without communication, this is impossible to achieve.
In quite a similar way, the camera also controls the iris of the lens. Although, this was not how older cameras did it.
Older lenses had dedicated aperture rings (generally just next to the focus ring) built on them, which let the photographer control the aperture.
Now all of that is done electronically.
So no points for guessing, once you attach the lens to the camera NOT using the actual lens mount, you will lose some functions.
The lens would not be able to autofocus anymore and most likely it would also have its aperture opened up to its maximum (its largest opening).
Make no mistake the reverse lens mount is nothing but a substitute of literally holding the lens in place. As I said earlier, most of them are made of plastic and they have no electronic connections whatsoever.
This is a hack, remember?
During this time, the camera hence may behave a little unnaturally. Don’t be startled.
Imagine its position. It sees that you have no lens attached to the camera and yet you want to take a photo. Give the little guy a break.
Most prominently, the aperture value may blink and show “00”. It’s just the code for ‘No lens attached’.
You will also not have any EXIF data of the images you take using the lens reversed. Sorry.
The silver lining to all of this is the freedom to use ANY lens you want. Since the lens mount doesn’t play a factor anymore, you could mount a Canon lens to a Nikon body, a Lumix lens to an APS-C body….basically anything goes.
All you need is the correct reverse lens adapter or you could just hold it. You choose.
Actually Taking The Image
Relax, you have already done the hard work. All that remains now is for you to reap the good harvest.
First and foremost, you may notice that the viewfinder has gone a little dark. This is very expected. Adjust the exposure of the image like you do with any other image. You may bump up the ISO a bit or slow down the shutter speed.
If you do go for slowing down the shutter speed, a tripod and a remote trigger are really advisable. Both of them are intended to keep the camera rock steady and avoid any unwanted jerks ruining the shot.
Focusing
There is another reason for being ever so precise.
Really really shallow depth of field.
I hope you already know the innate relationship between a subject distance and its depth of field.
I will just summarize it for you:
For the same aperture value, as the subject distance (from the camera) increases, the depth of field also increases.
This means that even a smaller aperture value such as f/1.8 will have a huge depth of field if the subject is sufficiently far away.
For a detailed discussion about this, read: Subject Distance & Aperture Value | This Is What You Should Know. This post may open up unexpected possibilities for you, break notions that you just believed to be true.
Macro photography is anything but from a distance. You shoot subjects which are literally inches away from your lens.
So it goes without saying that the depth of field you would have available is shallower than you think.
Razor-thin. Specifically.
So you would have a very small part of the image in focus, anyways. To get it right, you can use a few tools at your disposal like zooming in 100% with Live View or Focus Peaking.
A small piece of advice that I may suggest here is to actually physically move towards or away from the subject rather than using the focusing ring on the lens. This technique for me works better.
Set Aperture
Unless you have a really old lens which has a dedicated aperture ring, this is going to be a little finicky.
You see, modern lenses have a spring-loaded iris control built inside the lens.
Under normal circumstances, the aperture of the lens remains open all the way out (largest aperture opening).
When you choose any aperture value which asks for a smaller opening, the camera registers it but does NOT immediately close up the aperture of the lens.
Instead, the camera waits until an image is shot. Just as the shutter of the camera only shuts and closes when an image is recorded, so does the aperture of the lens.
You can see this happening yourself. Just choose a larger aperture value on your camera and keep looking inside the lens as you take a shot. You will see that the lens closes down the aperture just for a fraction of a second when the image is being recorded. As soon as that is done, the aperture goes back to being a large opening.
The Fix
There are two popular solutions for setting up the aperture of the lens when reversed.
Depth of field preview button: This works by selecting a specific aperture value while the lens is correctly mounted to your camera. Once you select a value what you have to do is press the depth of field preview button. While keeping it pressed, unmount the lens. The lens should lock in the aperture if you do it correctly.
As you may have already noticed, you will have to mount and unmount the lens to your camera every time you wish to change the aperture.
You should also note that this method only works for some of the lenses. Not all.
In case the above method doesn’t work, try the next method.
Tape Up
The next method is to simply use a bit of tape to pull back the aperture control tab on the lens and then use a tape to keep it there.
I know this sounds terrible and fraught with danger, but this is not as dangerous as it sounds. If this is any consolation, the camera pulls back on this very lever every time you take an image normally.
In the interest of being careful, all you have to do is use a piece of tape or blue tack or whatever which is easily removable and doesn’t leave behind a sticky residue. That’s all.
And don’t tug at it like a savage. Excercise calm while doing it.
Shooting Mode
Manual mode works the best. For obvious reasons.
Since the camera can’t sense the lens, it has very little idea of what to make of the situation and how to handle it. It is best not to use any of the Automatic or Semi-Automatic modes.
Shooting using a reverse lens is a lot of trial and error by definition. So, you will have to go through its paces before you find the best set of settings for your camera lens duo.
Lighting
You could use natural light for this and in many situations that would work just fine.
The reason for concern, however, is the small aperture value you choose to give yourself a large enough depth of field to fit in your whole subject. If you have read my Macro Photography Basics post, you would know how hard it is to adjust an ant into focus even with a humongous aperture value of f/45 from that working distance.
Basically smaller the aperture opening you choose, further it restricts light to get to the image sensor.
Artificial lights such as speed lights or strobes only give you a little more latitude and options to play with. They are in no way necessary.
Should You Try Reverse Lens Macro Then?
This is the big question that you need to answer for yourself. I laid out all the arguments for and against. It is for you to choose now.
Yes, it is a little fiddly and might freak you up the first time.
Exposing the delicate lens mechanics out in the wind and risking damage to them may also be nerve-wracking for some. Not to mention the amount of dust you may invite in the camera when you open it up while it is still on. Cleaning the camera up would definitely be a chore later.
But, on the other hand, you have the joy of shooting a genre of photography never before accessible to you and that too for FREE!


The most you have to buy is the reverse adapter, which is by the way dirt cheap.
If you ask me, this is a worthwhile gamble.
Just find a way around the problems.
- Change lenses in only a clean environment.
- Take extra care that you do not bump your camera accidentally against anything while the lens is still reversed.
- Finding the correct settings would only be a problem the first few times. If you use it often, I believe you would get the hang of it really soon like you got the hang of your camera settings as they stand right now. If anything, they are not easy and straight forward in any way.
In the end, it is your camera, your lens,a also your decision. How you weigh the pros and cons of this hacked-in technique is totally up to you to evaluate.
Make your choice.
And if you need me to deal with any doubts you may have, please use the comments section down below.
Keep shooting beautiful.
This is now a teeny tiny blog trying to compete with the big guys. If you liked what you read, please take a second to share it. It would help me a lot. Thank you.
Hand Picked For You
 Macro photography is defined as the genre of photography where the size of the p...
- Macro or Closeup filters are the cheapest way to shoot macro images. You could e...
- Having spent a substantial amount of time using the two very different types of ...
- Tilt-shift lenses are pretty much the closest thing we photographers have to pur...
- Depth Of Field is NOT fixed for a particular aperture value. This is a classic m...
- Leaning to clean your own camera is a very valuable asset to have. It should not...


