Are you in the habit of shooting long exposure shots, like waterfalls and fountains? Or maybe shooting videos for YouTube in broad daylight? Then I am pretty sure you have come across a problem. A BIG one, in fact!
How to use a long shutter speed or shoot using a large aperture when the sun is so strong…..Right?
Nevermind, I got your back. Let me explain.
For those of you who have not yet faced this particular problem and are thinking what on earth am I talking about, it is this. Generally when we are shooting images of regular subjects like a person, a building or a landscape, all we care about are the three elements of the Exposure Triangle; which are Aperture, Shutter Speed and the ISO. Most of the time, the camera is comfortable in shooting these subjects and we face no problem at all.
However, a problem arises when sometimes we want to exercise a bit more artistic freedom. For instance, while shooting long exposures of a fountain to make the water look silky smooth. Or even while shooting a video outdoors on a sunny day.
The reason? Light….Too much of it!
Yes! That can be a problem in itself too.

You see every photograph is made up of a certain amount of light. When you get the exact amount that is needed, the photograph is well exposed and you get a wonderful image at the end of it. If, however, you do not, the final image looks either darker or is too bright and washed up, depending on if you have under- or over-exposed it respectively.
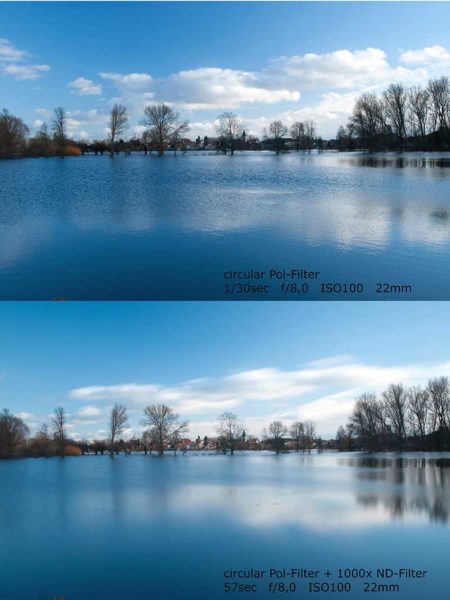
The problem with a long exposure during the day is it lets in a huge amount of light inside the camera. So much more than is needed. Sure you can make the aperture smaller and drop the ISO but sometimes even that is not enough to counteract the effects. On a sunny day, a 20 to 30 seconds long exposure allows so much light through to the sensor that the final image will nearly always be nothing more than white mist. You have overexposed the image. It is much easier to shoot the same subject at night since there isn’t so much of light around. Try it out yourself and you will know.
So, what is the solution?
Enter ND Filter
Neutral Density filter or ND filter is just the solution to this problem. Think of it as sunglasses for your camera. Whenever the scene is too bright and everything is glaring at your camera, throw in an ND filter and bring down the intensity of light so that you can work with it better and choose the setting of your choice.
Breaking Down ND Filter
As you already know white light, for example, sunlight is composed of various colors/wavelengths of the visible spectrum. What ND filter essentially does is, it reduces and regulates all the colors/wavelength equally. There is no preference or inclination towards any particular colour…hence neutral.
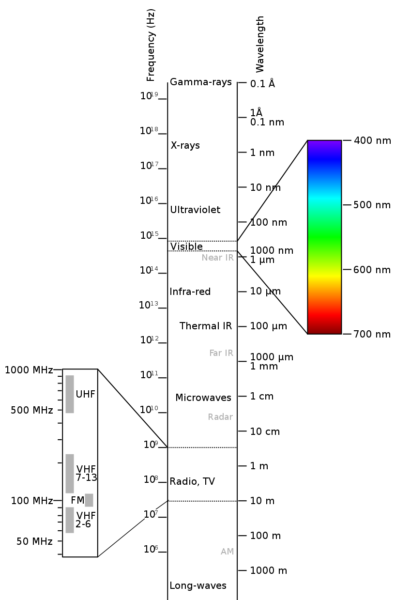
What this means is that the ND filter helps to bring down the intensity of all the light that enters the camera but does so without creating any color cast or otherwise messing with the final image. Red looks red, blue looks blue and green looks green. It does NOT modify or tinker with the color of the image at all. All it does is bring down the intensity of the light.
Uses
Practically think of ND filters as an extra latitude that you can control to regulate the flow of light other than the elements of the Exposure Triangle. Three most important scenarios where a ND filter might come in handy are:
- Long exposure, particularly during the day
- Video shooting in bright light and maintaining a shutter speed of 1/50th sec
- Adjusting Depth of Field, especially outdoors in the sun.
The challenge of all the above situations is the same, that of controlling extra light. I call it ‘extra’ light since this light is not needed to make the photograph or the video. It would only contribute to overexpose and ruin the final image.
So, like I said an ND filter allows you to regulate the amount of light entering the camera without requiring you to change any camera settings. In most of the cases that I mentioned above, even if you consider changing some setting, you may not be able to get what you want. There would be simply too much light.
A very easy example is shooting videos outdoors on a sunny day. As you already know when shooting videos, it is advisable that you use a shutter speed that is twice the frame rate. So, if you are shooting at 24 frames per second (fps) then you should, according to the rule, shoot with a shutter speed of roughly 1/48th sec or 1/50th sec. Now if you want to have a shallow depth of field (which means using a larger aperture) this might be a problem as at 1/50th of a second of shutter speed, a ton of light is entering the camera and there is no way to handle it.
Sometimes even if you want to compensate by choosing the smallest aperture and the lowest ISO, you still may not be able to stop the image from being overexposed.
Types
There are few types of ND filters depending on how they reduce incoming light and how they are mounted on the camera. Here are a few of them.
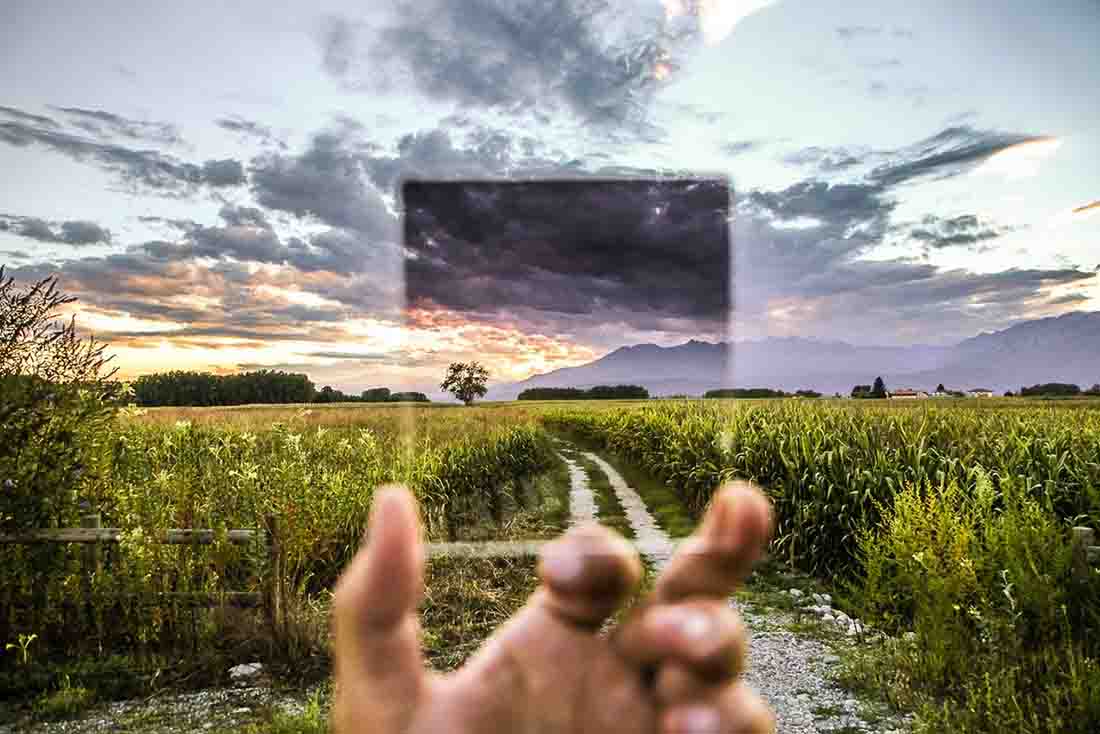
Graduated ND Filter
This is the type of ND filter where the intensity of filter varies across the glass in a certain pattern. Graduated ND filters are generally used by landscape photographers to primarily preserve details in the sky. They look something like this.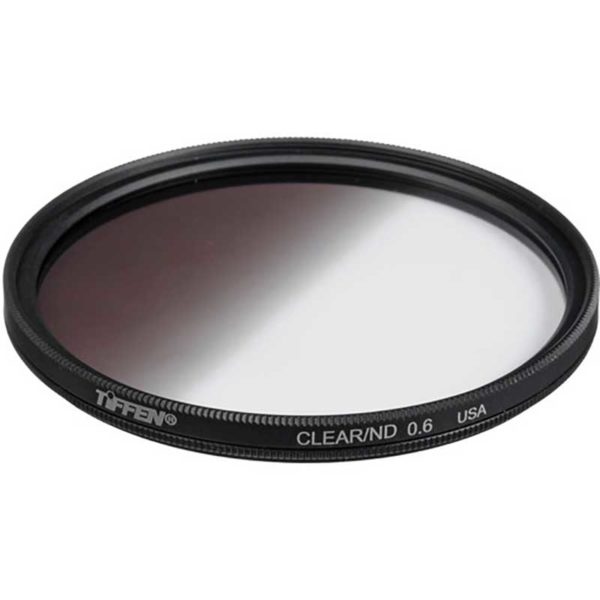
As you can see, the ND filter is much darker at one end and the dense coating gradually fades away as it approaches the other end of the filter.
You see what happens is when the photographer is trying to shoot a particular scene, more often than not the sky is brighter than the ground below it. Hence it is prone to get overexposed which will cause the sky to look washed out and featureless. To counteract this, landscape photographers use graduated neutral density filters so that the sky is toned down a little but the part below the horizon is not, resulting in a superior and detailed image.
There are a few types of graduated filters depending on the type of transition they offer:
- Soft
- Hard
- Attenuator
Variable ND Filter
Variable ND filter is like the all in one solution for ND filters. When shooting with NDs on a consistent basis, it is very likely that the photographer is going to amass a lot of them over a period of time. Mounting and dismounting them on the camera to select the exact specific filter you need for that specific light condition can be a pain. So, a group of smart photo scientists came up with Variable ND filters.
The trick is to use two perforated glass disks which could be counter-rotated to make the coating progressively denser. Basically, you can stick one of this on the front element of your lens and then rotate the dial just like you rotate a focusing ring to achieve the desired amount of light transmission. You don’t have to carry a bunch of filters or keep on swapping them ever again.
But there is a caveat.
Lower quality Variable ND filters tend to have horrible colour casts and weird tints all over the image. So if you decide to use one such, make sure you get a good one from a reputable company like Hoya, Tiffen, B+W, etc. They tend to be a little costly but they will be worth the investment. Try not to get the cheap one even if everything looks the same. They may destroy your precious images.
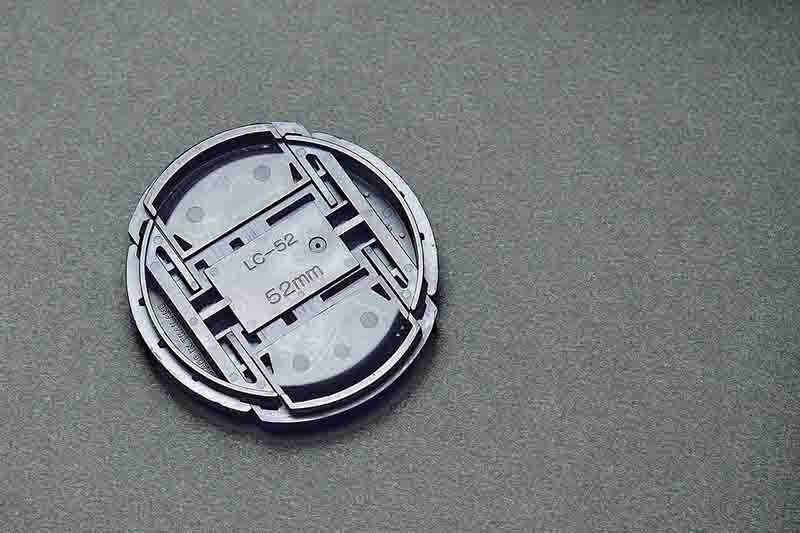
Screwmount ND Filters
They are filters which mount onto the front element of your lens. For this, you need to know the diameter of your lens. The diameter is generally mentioned on the back of your lens cap or on the brim of the lens itself.
Tip: Always try to buy an ND filter that fits the largest lens (in terms of lens diameter) you possess.
Why?
Because you can use that same ND filter for all your smaller lenses silly! Just get a set of the cheapest set-up rings you can find and you are done. Now, you can use those rings to fit the larger ND filter on any smaller diameter lens.
Square Filters
They are square counterparts of the same ND filter. Square filters are generally used in conjunction with a filter holder which is attached to the lens itself and then the filter can be placed in the grooves provided. This type of filters is widely used by landscape photographers who use graduated filters.
Classification
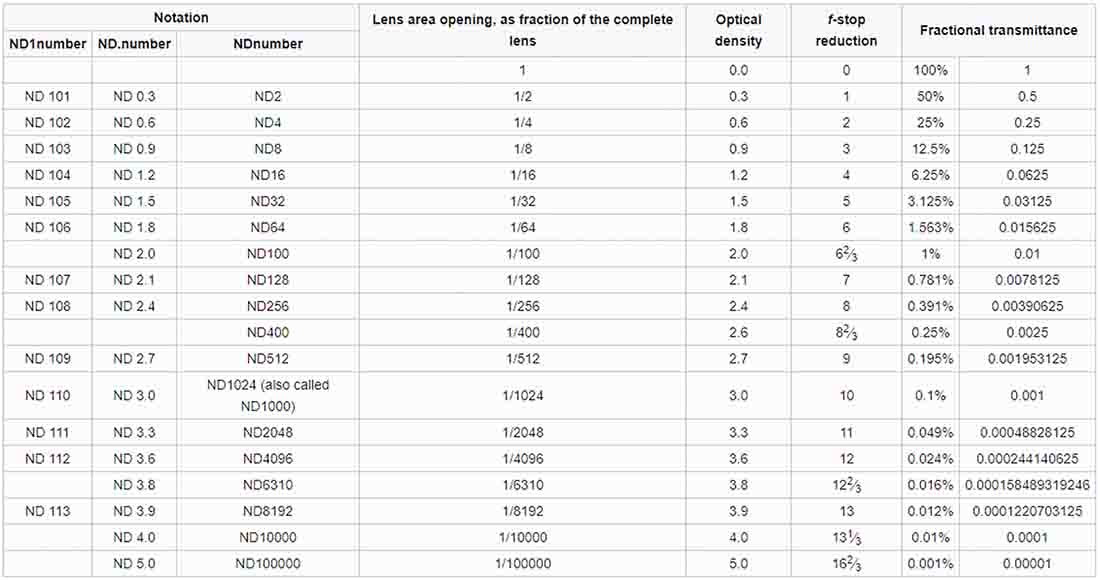
Since ND filters are like sunglasses for your camera and their primary function is to block light, we classify them depending on how much light can they block. Makes sense right?
So, depending on how dense the coating is on the filter (optical density) and how much light transmission it can tone down, we have filters of various ‘powers’. In most of the cases, this is measured by f-stops like everything else in photography. Some manufacturers have adopted other methods and nomenclature to represent the filter’s light reduction capacity but the f-stop measurement is the most widely used.
Here is a chart that you can refer to.
A Few Things To Keep In Mind
These are just a list of few things I wish somebody had told me when I was new at this.
- ND filters do NOT filter out Ultraviolet (UV) or Infrared light, so do not even try to attach them to a camera and shoot the sun. Even when you have a 10-stop filter. Okay, especially when you have a 10-stop filter. It might look dark and thick but it does not offer any protection from Infrared and UV light. It just reduces light from the visible spectrum only. Solar filters are capable of filtering out UV and Infrared rays and they are completely different.
- You can use multiple ND filters at a time. Stack them up on one another (both screw-mount and square format filters can be stacked up) so that you have to buy less of them. There is a downside to this method. It reduces quality. Usually using multiple ND filters by stacking them up results in image degradation or even vignetting. Whenever possible use only one at a time.
- When using extreme ND filters like something that stops more than 9 stops of light. It would be very hard to see through the camera when the filter is on and it will be even harder to use the autofocus. The best way to counteract is to mount the camera on a tripod, frame your shot and focus on the subject (use autofocus if needed). Once you have acquired focus, switch off the autofocus and mount the filter on. Lastly, adjust for the filter. If you are using say a 9-stop filter, tweak the setting in a way so that you allow 9 more stops to enter the camera. Click away then.
- If you shoot lots of videos outdoors, variable neutral density filters are your best bet. They adapt to light changes seamlessly and save you a lot of time and effort. Just make sure you do not buy a cheap glass. Save up and get a good one.
- If you are as broke as I am, get a welder’s glass plate. They serve as excellent ND filters. Just not in all the scenarios, hustle up that part and come up with some solution then. Make sure you share that with me too. I need it.

- Buy the cheapest set of step-up rings you can possibly get and always buy a filter which fits your largest lens you have (in terms of lens diameter).
The End
That is it guys. I hope this helps you get a good basic understanding of what neutral density filter is and why we photographers use them. Give them a try and see how you feel about them. I will be very happy if you share your experiences with me.
Keep shooting beautiful.
