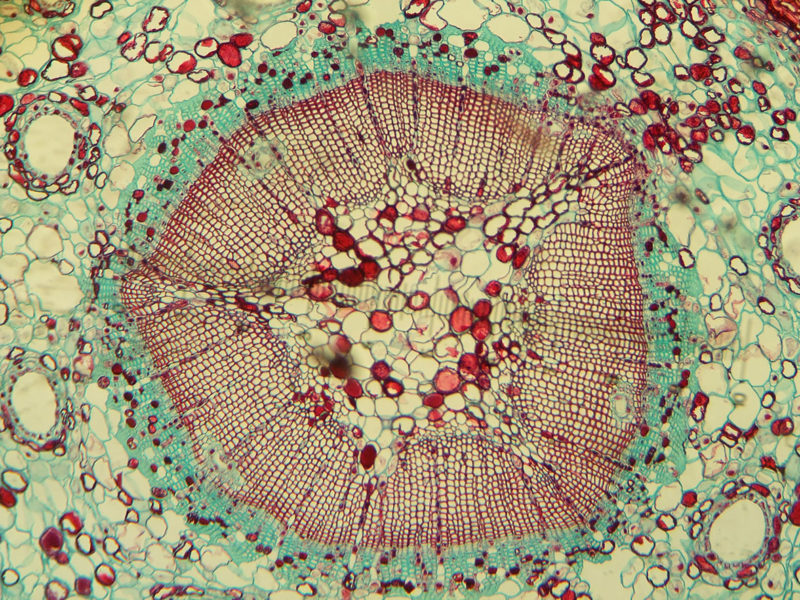
Macro Photography is really exciting and addictive if you can do it correctly. It really doesn’t matter where you live, where you are, you can find amazing subjects just about ANYWHERE. My friend who took up microbiology in school once described to me what made him so fond of the subject. He said that the first time he looked through a microscope, “it was like discovering a whole new universe”. I believe Macro Photography is no different.
Photography for me is all about the vantage point and the unique point of view the photographer tries to share with the world. We all know how everyone’s day-to-day lives look like. What makes photography incredibly powerful is the ability to tell stories by making people look at certain things in certain ways that they have perhaps never thought of. Macro Photography is, I believe, one such beautiful way of showing the extraordinary among the very mundane and ordinary.
Technically, Macro Photography is defined as the genre of photography where the size of the photograph of the subject is larger than the subject in real life. By some definitions, Macro Photography is also defined as the genre of photography where a minimum of 1:1 reproduction ratio (life-size) is used, i.e, say if you are shooting a lady-bug which is one inch long then the size of the resulting image on the camera’s sensor should also be one inch long.
Similarly, 1:2 reproduction ratio means half life-size and 1:4 means quarter life-size.
Nevertheless, we all know what exactly Macro Photography is. We all have seen it in many places and wondered “how did the photographer get such an amazing close up photograph of that spider?” or say “how amazing the eyes of a grasshopper look when magnified!” Well, do not worry anymore. You will learn everything there is to know to start off shooting macro photographs in NO time.
Let’s start digging then.
The Depth Of Field Conundrum
Let me give you an example here :
I usually use a Nikon D7000 myself which is a DX format (crop sensor) camera and a Nikkor 50mm f/1.8 G lens for my day-to-day street photography. The minimum focusing distance is not something that I really care about as I invariably always shoot subjects which are further away than the minimum focusing distance of my lens. But this is NOT the case with Macro Photography. You probably already know that the depth of field (DoF) becomes shallower and shallower as the distance between the camera and the subject decreases. (I will explain why this is a problem).

You may read more about Depth Of Field and Aperture here: Camera Aperture | A Comprehensive Guide For Beginners.
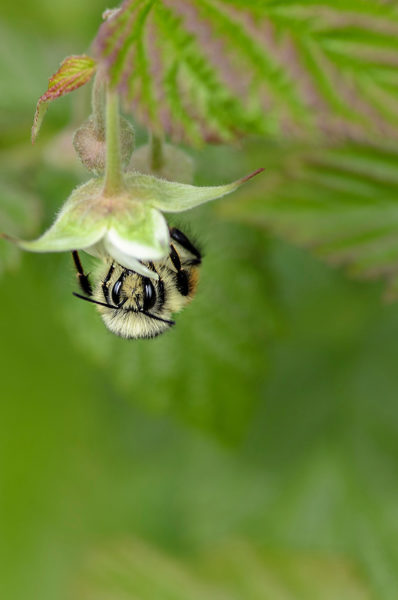
Try and imagine the same DoF scenario with respect to Macro Photography. Usually, a flower or a bumble bee is shot from centimeters away (like the image above), so I guess you can easily imagine the reason why an average kit lens cannot be used to shoot Macro Photography subjects.
Two Main Reasons
- Focusing Distance: The minimum focusing distance of an average kit lens that comes bundled with a camera is often further away than is needed for Macro Photography. For example, the Nikkor 18 to 105mm f/3.5 to 5.6 VR lens that came with my camera focuses at a minimum distance of 0.45 m/1.48 ft. (throughout the entire zoom range). This means that I cannot focus on any subject that is closer than 0.45m. The subject has to be at least 0.45m or 45 cm away from the camera.
- Depth Of Field: Since, in Macro Photography, you are required to shoot subjects from such close proximity, the depth of field (DoF) becomes a real problem. Because you are so close to the subject, the DoF that you get to play with is generally a millimeter or two. So the tiniest of movement of either the camera of the subject may throw the entire image out of focus. I can assure you bumble bees are not cooperative in this regard at all.
If you want to know what is the exact depth of field, minimum focusing distance, etc. for your specific camera and lens combination, you can use an app like DOF Calculator, or you may also use one of the online calculators.
There are many ways that you can shoot Macro Photography shots; some of them are free, some inexpensive and some a little expensive but the results are equally great.
Let’s get to the good stuff then.
Free Way
Many point and shoot cameras have a built-in ‘macro mode’. When selected, the mode allows the camera to focus really close to the camera thereby allowing the photographer to shoot beautiful macro shots at NO extra cost at all. Some DSLR zoom lenses also have a ‘macro mode’ built in. This also does the exact same thing and helps the camera shoot really close to the subject.
Inexpensive Ways
Diopter: First of all, let me clarify this by saying that this is not the same same thing as the one on your viewfinder. Yes, the function is the same but in this case, the diopter works like a giant magnifying glass attached to the front of the lens. The diopter looks like a thick UV filter and the principle which applies here is pretty much self-explanatory. The diopter magnifies the subject, the lens captures the magnified image and the outcome is almost a life-scaled image of a tiny subject. It basically is a magnifying glass for your camera.
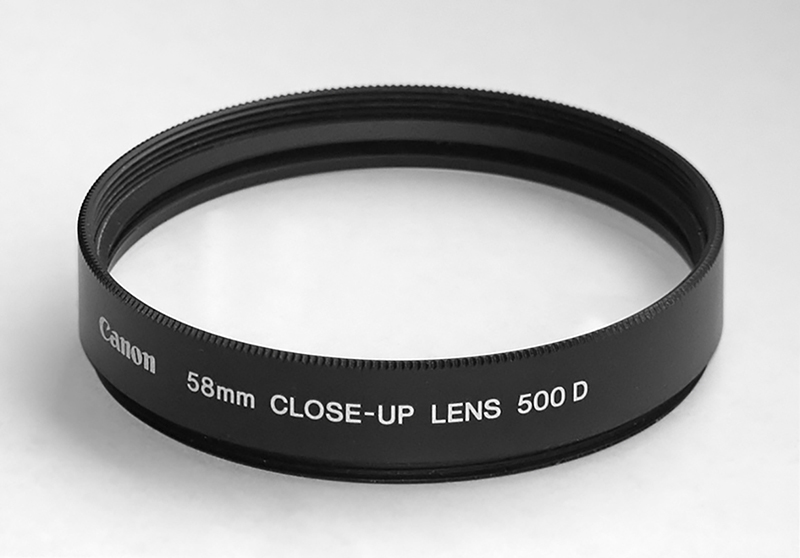
Diopters are pretty easy to use and they are very inexpensive, a lovely option for a photographer who shoots the occasional close-up macro shots.
Extension tubes: The only basic function that extension tubes perform here is to decrease the minimum focusing distance of the lens by adding a little extra space between the lens and the sensor of the camera. The extension tubes DO NOT have any lens elements or glass in them; they are just a hollow cylindrical structure that has the capability to carry forward the electrical connections from the camera to the lens motors. If you are not very familiar with Macro Photography you should know that one of the major problems of shooting tiny subjects is the ability to focus really close.
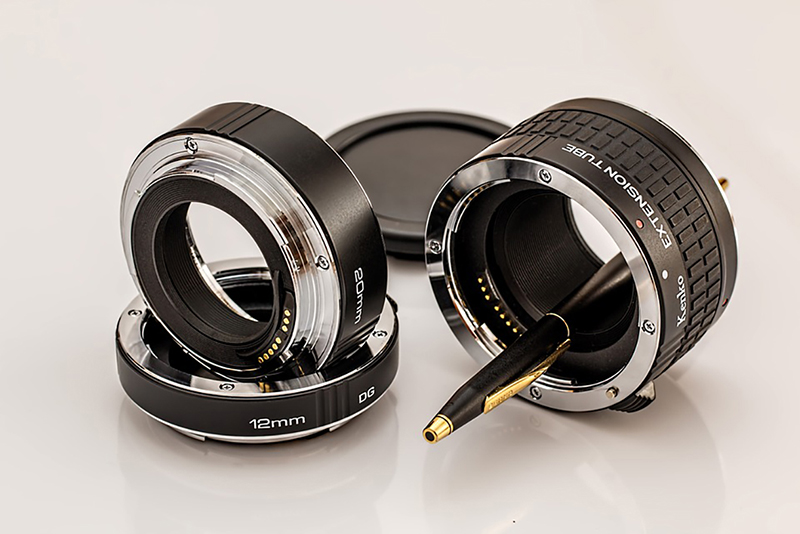
The extension tube just INCREASES the distance between the lens and the camera’s sensor so that the camera can focus closer. One thing to remember here is that even though the camera gains in terms of close focusing, it loses in terms of infinite focusing. Very often you will find that while using extension tubes it is very difficult to focus on something even five meters away.
The message is therefore simple and clear. You can only use the extension tubes while shooting occasional close-up macro shots, but you CANNOT have them on all the time since the lens loses its capability to focus on objects a little further away.
The Expensive Way
As always there is an easier and a little expensive way to enjoy Macro Photography; through dedicated macro lenses. Yes, macro lenses are costly but I can assure you the image quality you get out of them is well worth it. The lenses are available for various focal lengths depending on your need and most of these lenses can go to very high aperture values such as f/32 and f/45. You probably never use such high aperture values (remember higher aperture value represents a smaller aperture and vice-versa) in your daily shooting, but shooting subjects from a few centimeters away requires such high aperture values to have a working depth of field. Macro Photography lenses usually have a profound and accurate focusing ring that allows those little bits of adjustments needed to shoot such tiny subjects. The lenses also generally have a switch that allows you to adjust your focus range.
The subheading on this paragraph says ‘expensive way’ but trust me when I say this if you are serious about Macro Photography and do want to take good images, these lenses are worth every penny you pay for them. They do seem costly as compared to other lenses but you have to understand how difficult and costly it is to construct such a lens that can take such incredible images with so much details.
For the ‘not so serious’ Macro Photographer, extension tubes are more than you will ever need. You can just use an inexpensive 50mm lens with an extension tube and get good results too.
Our Favourite Lenses
Canon: Canon EF 100mm f/2.8L IS USM Macro Lens.
Nikon : Nikon AF-S 105mm f/2.8G VR IF-ED Micro
Just one last thing. When buying a macro lens, do consider buying a lens that has image stabilization. Do not make the mistake of saving a little bit of money and buying a cheaper ‘un’stabilized version. You may not think of it to be a big deal but it really is. Without it you might get away with absolutely rock-steady subjects like a carving on a wall or intricate details on a statue, but a flower swaying in the wind or a flying bee will have you stumped if you do not have image stabilization on your lens.
The Next Most Important Item
You guessed it right, it is the humble tripod. If you think about this, it is pretty easy to put your finger on it. The name of this genre of photography is Macro Photography but everything about it is ‘micro’ in size; the subjects, the depth of field, the margin of error. A good sturdy tripod is not only needed but is an absolute necessity when it comes to macro photography. The prime reason why you need a tripod is the teeny tiny depth of field you get within such little spaces.
If you have already tried your hand at Macro Photography, you perhaps know that it incredibly difficult to get your entire subject in focus. You have to be incredibly lucky to have your subjects parallel to the camera. If not, maybe only the eyes or a part of the subject would be in focus at a time. Accuracy hence is the need of the hour; a sturdy tripod helps you anchor the camera securely so that you may be rest assured about the camera’s position and concentrate more about the important parts like composition and framing of the shot.
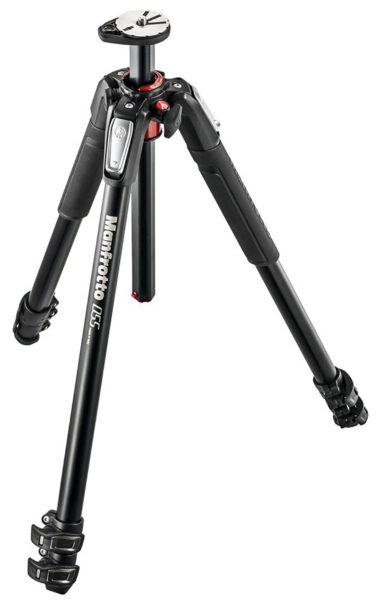
For Macro Photography you need a tripod which is FLEXIBLE, period. Now you are shooting a flower high up on the tree, and now you are in the dirt looking at an ant colony. You never know when, where and in what position you are going to find the next interesting subject. Hence, you need a tripod that can handle all these crazy heights and angle, and still keep your camera rock solid and planted.
Cable Release
Cable release is used to reduce camera shake while shooting. In DSLRs, it is also recommended to use mirror lock-up. The slapping of the mirror may just move the subject out of focus or worse it may turn the entire image blurry. Even while using a mirrorless camera, you should use a cable release or a remote to trigger your camera without touching it.
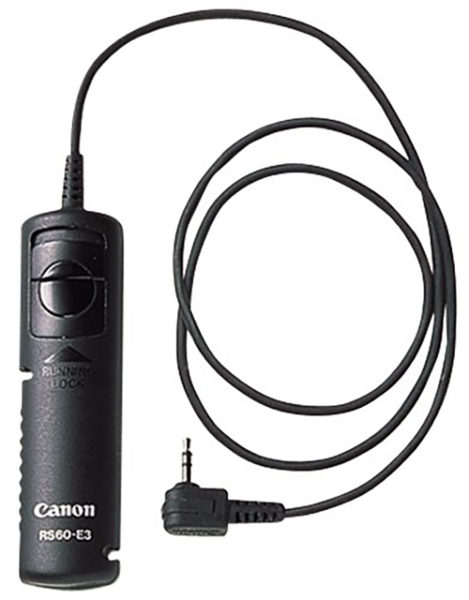
Many times in our daily shooting, we unknowingly introduce a little camera shake in our images when we press the shutter button; but they are not always that prominent and visible since the depth of field is large or the shutter speed is fast enough. In Macro Photography, however, the margins are so thin that even a micro movement may destroy an image.

Macro Ring Flash
A ring flash is a fancy looking flash which attaches to the front of the lens and is connected via the hot shoe on top of the camera. It looks something like this:
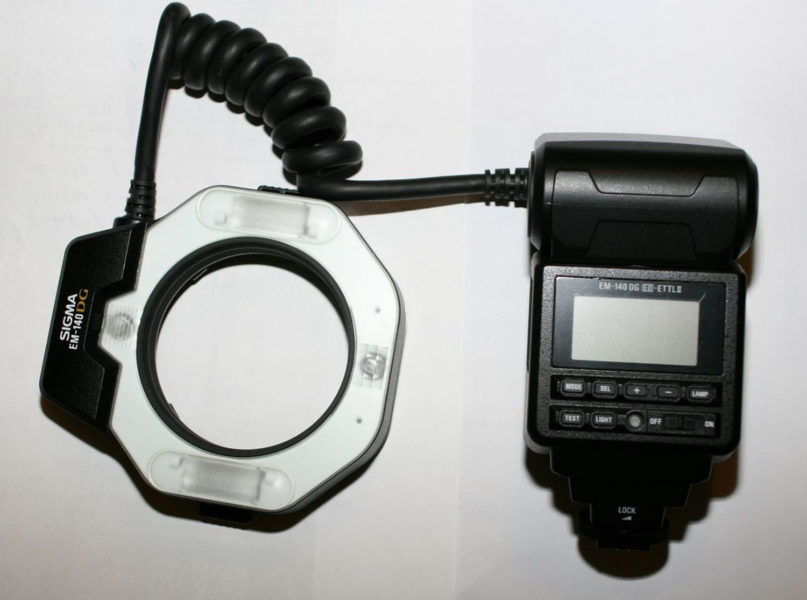
Why would you need an external flash? The reason is the high aperture values you need to shoot at to get any form of depth of field to play with. Because you are shooting at such high aperture values like f/16 or f/32, the aperture would be really really small thereby allowing very little light inside the camera. You may be surprised to know that even when shooting in direct sunlight, the light may NOT be enough to shoot with.

There may appear other hindrances too. This happened to me many times. While shooting you think “wow what a lovely day to shoot, lots of light to play with”, but just when you finished setting up your shot you find that the camera is blocking the light and casting the shadow on the little spider you have been eyeing all afternoon. A ring flash comes in very handy in these scenarios.
You can also use a lens mounted flash creatively like for freezing motion or some other innovative effects. You may not need it all the time but a ring flash in a Macro Photographer’s bag always acts like a good insurance policy in ‘just in case’ scenarios.
Bonus Tips
- Use manual focus: Since the DOF is so shallow, it is best to focus manually and adjust the focusing yourself and do not let the camera decide what you are focusing on.
- Live view: Manual focusing works pretty well with live view even more so when you are on a tripod. Switch to live view and magnify the part you want to focus on. Perfect focus….every time.
- Focus stacking: If you cannot get all of the subject or the part you want to be in focus and your subject is not moving, you may use image stacking. It is a great way to take multiple images by shifting the focus progressively and then stitching all the images back up in post-production to form a perfectly focused image.
- More megapixel may not always be the best bet. Try and use a camera that has a better pixel density, i.e, more pixels per millimeter. More pixel density will result in better magnification.
- If you use a Canon camera to shoot, use Magic Lantern. It will make your life drastically easier.
You are now all set to go out there and make amazing photographs of tiny specimens of beauty we mortals nearly always miss. Keep in mind all these bits and I am sure you will do great.
Go shoot beautiful!
Hand Picked For You
 Macro or Closeup filters are the cheapest way to shoot macro images. You could e...
- Reverse Lens is a technique where a normal non-macro lens is attached to the cam...
- Getting sharper images out of your camera is much easier than it is made out to ...
- Understanding Autofocus Modes is crucial for you to master your camera and take ...
- Tilt-shift lenses are pretty much the closest thing we photographers have to pur...
- People live in fear of the Manual Mode all their life, never looking at it close...


Hello to all
In this difficult time, I proclivity you all
Prize your one’s nearest and friends