You are not the only one who has shot a dark, blurry image and cannot figure out what the problem is.
Since the beginning of time, any Tom, Dick, and Harry who has bought a new camera and tried it out has faced similar issues. So, don’t worry too much. Your camera is fine. You have a great lens, and NO you did not make a big blunder in buying it.
You just simply need to learn to use it.
What dials to turn and what buttons to press, and how to handle the various situations you are likely to face in your one-eyed life.
So let’s get on with it.
Below, I have listed all the common problems new photographers are most likely to face and their quick fixes. I strongly urge you to read the entire list instead of only finding the problem and the solution you came looking for. Who knows when you will require every bit of knowledge.
Blurry Image
This is by far the most common problem new photographers face when they go out to shoot with a DSLR or Mirrorless camera for the first time.
You see, before this day they almost always shot images using their phones which right off the bat chooses a fast shutter speed to freeze the action. With an actual camera that isn’t on the Auto Mode, this, however, is NOT the case. The camera is completely reliant on the photographer for a correct set of settings and when that goes wrong, the image without any surprises comes out blurry.
So how do we correct this?
Before I answer that, I want you to know although most people generalize and call some shots blurry images the moment they come out soft and hazy, the reason why this might happen can be very different.
The three primary reasons for blurry images are
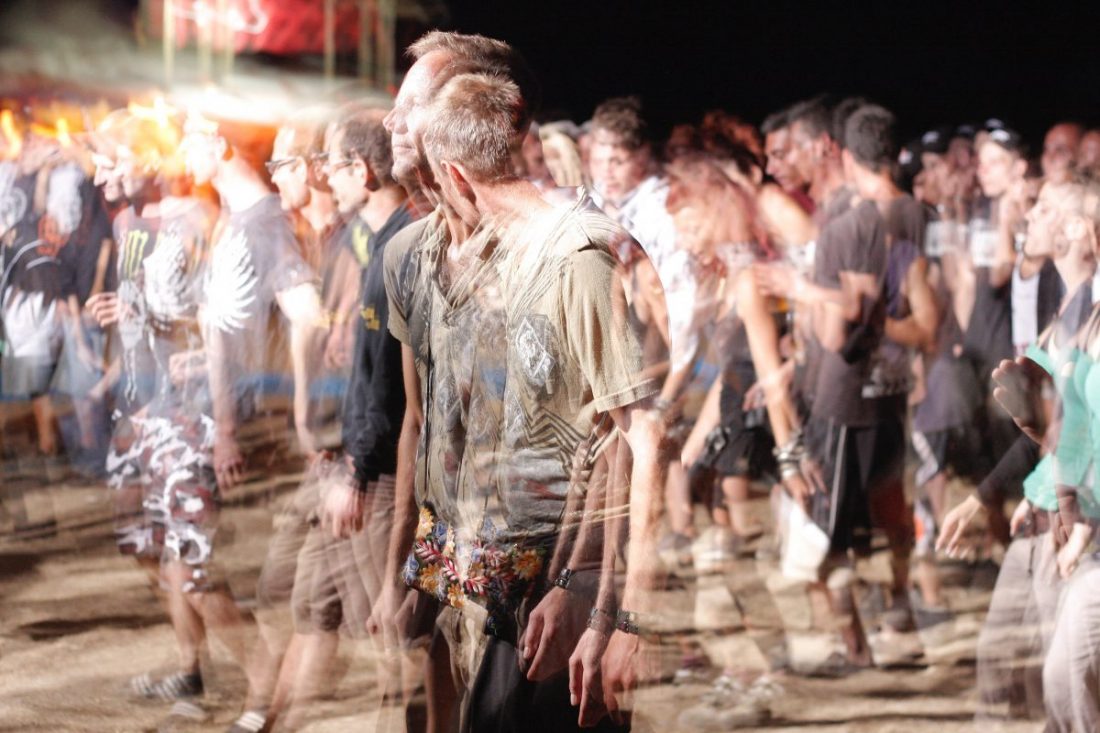
- shutter speed relatively slower than the primary subject or other elements in the scene,
- camera shake, and
- bad focusing
Let’s break them down now.
Slow Shutter Speed
This is predominantly the most common reason why images turn out to be blurry. But beware of the fact that only mentioning “slow shutter speed” to be the reason why an image is blurry is wrong.
The technically correct answer would be that the shutter speed is slower relative to the elements in the scene. This is to establish the fact that the duration of the shutter speed is categorized as fast or slow depending on the amount of motion in the scene.
We photographers generally call any shutter speed fast if it is roughly faster than 1/250th of a second. This is probably because 1/250th of second shutter speed has been widely used to take portrait images for a long time now. It is safe to say that 1/250th of a second can be used to freeze any potential motion and take a sharp image of a stationary or moving human.
But that is not the case with everything.
1/50th of a second shutter speed can be fast enough to take a photograph of a landscape or a building where nothing moves. But the same 1/50th of a second is very very slow for an image of a running footballer or a fast-moving car.
Long story short, any shutter speed which is quick enough to freeze the amount of motion in the frame and make a sharp image is called fast. On the other hand, if the shutter speed allows motion blur to creep in, it is deemed as a slow shutter speed for the specific situation.
I wrote a long detailed post about this, explaining the nuances of this. Read: Want Sharper Images For Life? This Is How You Do It
Symptoms: Fast-moving elements in the scene look blurry NOT the entire image.
Solution: Use a faster shutter speed.
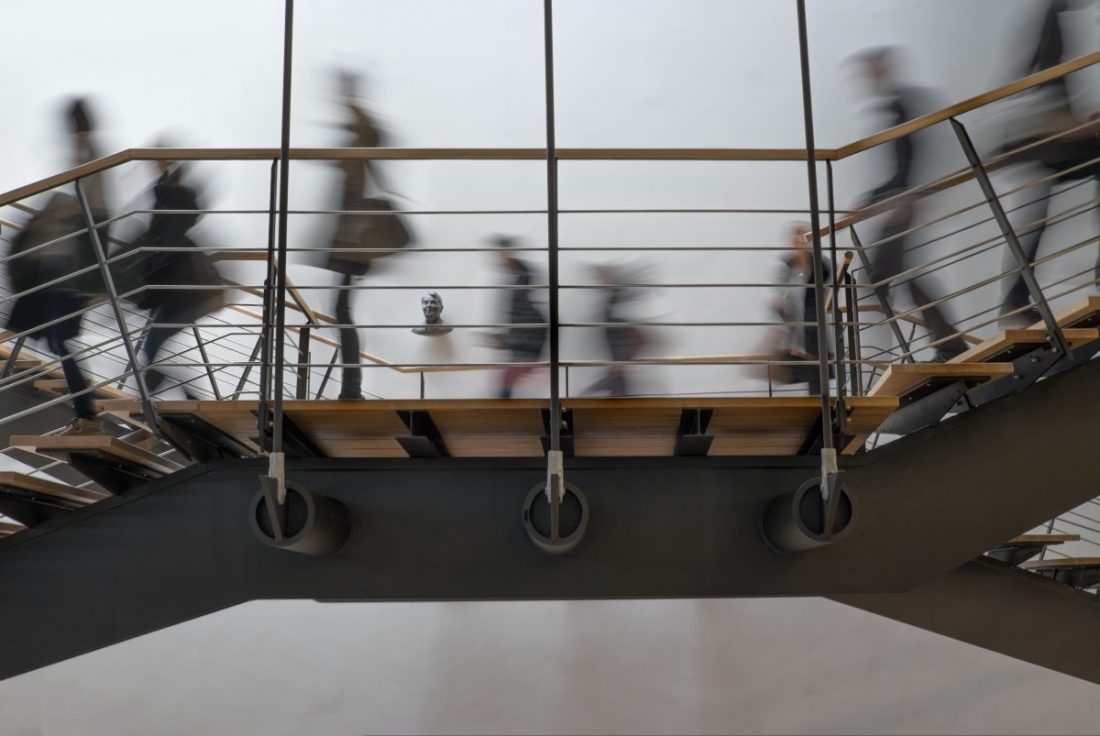
Camera Shake
You…. yes, you too could be the reason why a photograph may turn out blurry.
Camera shake refers to the small vibrations or movements you, the photographer, cause while taking the image.
This is easily avoidable and barely noticeable when the shutter speed is fast enough. But with slower shutter speeds, even the slightest movement while pressing down the shutter button or breathing may cause the image to be fuzzy.
Symptoms: The ENTIRE image looks blurry and not just a particular region.
Solution: Use a faster shutter speed or stabilize your camera better. For example, use a steady tripod.
Bad Focusing
Photographs may turn out to look hazy and indistinct if you do not focus on the subject accurately.
Depending on the aperture value that you use and the distance between the subject and the camera, the depth of field of the image may vary greatly.
A smaller aperture value helps in creating those beautiful images with creamy background blur but those are also the ones that are most susceptible to missed focus.
The depth of field in some cases may be so small that even a slight movement by the subject or the photographer or both may result in the image being out of focus.
Try out this depth of field calculator and find out for yourself how much you can actually keep in critical focus.
Symptoms: If you are not off by a lot – a particular area that is supposed to be sharp ( for example eyes of a model) looks soft but some adjacent area (say the ears of the model or the nose) looks sharp.
Solution: Refocus and take another shot. Try and make as little movement as possible. If in doubt, use a larger aperture value.
Suggested Read: The Only Guide You Need To Master Digital Camera Autofocusing [Part 1]
Camera Diopter
This is a sneaky one and there is a high chance you didn’t even notice this on your camera.
I am talking about the camera diopter.
Think of the camera diopter as a lens that is attached only to the viewfinder. This is primarily used to help photographers with glasses, see without using their visual aid. It aims to make up for it.
The reason why I am talking about it here is because sometimes when the diopter is improperly adjusted it may make the entire scene look blurry when looked at through the viewfinder.
Any images you take, if focused properly, may come out just fine but it may look horribly fuzzy through the viewfinder.

In case you are wondering about the easiest way to find out about a misaligned diopter, just check whether the symbology, i.e., the panel (generally at the bottom of the viewfinder) which shows the current camera settings look blurry or not. If it does, you need to adjust the diopter.
Further Reading: Camera Diopter | What All Photographers With Glasses Should Know
Image Too Dark Or Too Bright
Now we enter the realm of image exposure. If you don’t know this already, this deals with how dark or bright the image is.
If your image looks too dark, it directly means that the camera doesn’t have the optimum amount of light to make an image out of.
So, as a solution, all you have to do is make sure more light is available to the camera. Easy as that.
Now, the problem here is twofold.
- Less light may be entering the camera because of a particular set of settings that you are using.
- There may be less light to work in the scene in the first place.
You have to figure out the correct option before we can proceed here.
If it is the latter and you have a dimly lit scene on your hands, the best possible solution is to find a way to add some light to the scene.
Depending on the situation you may add another source of light, or change the position or angle from where you are shooting. Choose a different time of the day to shoot or lastly just fire the on-camera flash.
On the other hand, if the scene you are shooting is plenty bright and there is no dearth of light for sure, you may need to fiddle with the settings.
The objective behind tweaking the camera settings is the same as before. Allow more light into the camera.
So, we start with the elements of the exposure triangle of course. Since we are trying to get more light in the camera than before, we need to do the following:
- Use a smaller aperture value (if previously using f/8, try f/5.6)
- And/or a higher ISO value (if previously using ISO200, try ISO400)
- And/or slower shutter speed (if previously using 1/250th of a second, try 1/100th of a second)
It should be noted here that you do not have to do ALL of the above to get in more light. One change in one of the elements may be enough to offset the light deficit.
Which element to choose to adjust and by how much is a different question altogether. If you want an answer to that, I strongly suggest you read: How To Embrace The Manual Mode Like A Pro | For Beginners.
Just read the section where I explain how each change in one of the elements of the exposure triangle affects the overall image. That should be enough for a solid start.
A few more things to make a note of:
Camera Histogram: The LCD behind your camera may or may not give a very accurate representation of the actual image it took. Most semi-pro and amateur-level camera bodies are infamous for this. You cannot judge image exposure based on the LCD alone. You could, however, use the histogram to very accurately keep track of the image exposure. Keep an eye on it when you shoot.
Exposure compensation: Even when the camera settings are correct for the scene, the images may turn out to be too dark or bright if the exposure compensation dial is turned one way or the other. Think of the exposure compensation dial as a way to communicate to the camera to over or underexpose an image. Exposure compensation is used in very specific conditions. So if you are sure of the camera settings but the images still come out dark or too bright, make sure to reset the exposure compensation dial.
Too Bright
Handling images that look too bright is easier than handling images that look too dark.
The simple reason is that now all you have to do is block light from entering the camera.
Just reverse the camera settings I advised earlier, and you should be okay.
However, a situation may arise when you are not at liberty to actually change a particular setting. For example, when trying to shoot a long exposure shot, you cannot hasten up the shutter speed. To cut down on the light intake, you may have to take resort of external tools such as Neutral Density filters (ND filters).
Blown Out Areas Or Dark Patches
If particular segments of your image look too bright and washed up or, on the other hand, too dark and devoid of any details, you may have a problem with the dynamic range.
Dynamic range is simply the difference in brightness between the brightest and the darkest parts of the SAME image.
So, say you are shooting an image of a person sitting on a tool near a window. If you meter for the person’s face and the sun is shining brightly outside, it is most likely that you would find the window to look like a giant white spot.
Different camera bodies have different dynamic ranges. No points for guessing, professional-grade bodies have a larger range than the semi-pro or amateur bodies. Adding to the bad news, there is no way you can expand the dynamic range of your camera.
You, however, can use a trick to get around this problem. But then you have to take more than one image.
This technique is called Exposure Bracketing.
The idea is simple. Instead of trying to fit the huge dynamic range into one image, what we do is take multiple shots with incremental dynamic range progression and then combine them all during post-processing.
I know this sounds difficult and tedious, but trust me it is way easier than you think. This takes about the same time as a regular shot since you can automate most of it.
Here is all you need to know to take your first bracketed shots: Auto Exposure Bracketing (AEB) | All You Need To Know.
Once again if you have a doubt about whether the bright areas are actually blown out, make sure to check the camera histogram. It is a surefire way of checking exposure. At any rate, refrain from trusting your naked eyes and the back of the camera LCD screen.
Grainy Image
This again my friend is a problem that is associated with low-light shooting.
Here is what happens under the bonnet.
When the amount of light available to make an image out of is very little, the sensor of the camera has to be extra sensitive to wring out energy from every last photon. Just to remind you, the degree of sensitivity of the camera sensor is what you control using the ISO dial.
Larger the ISO value you use, the more sensitive is the camera’s sensor to the incoming light and vice-versa.
Long story short, you are getting a grainy image because you are using a high ISO value which causes digital gain to kick in.
Solutions:
- If the amount of light available in the scene is actually not that scarce, try and modify your settings to allow more light in. Lower down your ISO value and try to adjust the light deficit by either opening up the aperture (use smaller aperture value) or longer shutter speed.
- If not, you need to add more light.
What ISO Value Counts As Too High?
Again, this depends. Primarily on the performance of the image sensor you have in your camera and on your personal taste.
Generally, newer and pro-level camera bodies have better ISO performance.
It should also be mentioned here that ANY image, no matter what ISO value you use, will have a certain amount of grain in it. That is just how it works. The only difference is at lower ISO values (such as ISO100) the grain/imaging noise is so small that you cannot see it.
How much image grain is acceptable is also a very personal choice. Some people may call absolutely fine images grainy if they find even a small iota of a dark spot on it after zooming it at 300%.
I would suggest you find out your own threshold limit for grain acceptance by shooting the same subject with the same light at different ISO values and then look at them closely on the computer. In my case, any image up to ISO1600 with my camera seems perfectly usable with very little or no visible noise.
Once you figure out your ISO threshold number, you may find this post very interesting: Auto ISO | Everything You Need To Know.
Colors Looking Off
Colors in your images could look wrong in the following two primary ways:
- They may look washed up (low saturation and/or vibrancy).
- They may seem to have a tinge of color cast. Red may look orangish.
The main reason for the first problem is image exposure. When the amount of light entering the camera exceeds the amount required to make a well-exposed image, the colors tend to look washed up.
This is particularly accentuated when there is a chance of the light directly entering the camera from the light source. WITHOUT bouncing off of the subject first.
The solution is pretty simple if the problem arises due to over-exposure. Allow less light to enter the camera. Cut off the amount of light available or modify camera settings.
If, however, there seems to be a color cast on the entire image and/or the representation of the color seems inaccurate, you may have a problem with White Balance.
What is White Balance, you ask?
In the simplest way possible, white balance is the process of reproducing the colors of the image the way you saw it with your naked eyes when you took the image.
So how do you set the correct White Balance for your image?
To start with, you can set your White Balance to the “Auto” mode. Most camera bodies perform quite well when it comes to white balance. Even if it doesn’t nail the correct balance every time, it would certainly land pretty close.
If the Auto White Balance on your camera is not giving you satisfactory results, you may go the distance and take up more control. Basically, set it manually.
Here is all you need to know: White Balance For Beginners | A Comprehensive Guide.
Just remember one thing. Shooting in RAW format allows you to change the White Balance of an image later. You could set the White Balance during editing if you want to. On the other hand, shooting Jpegs bakes in the current White Balance into the images permanently.
Flash problems
The humble on-camera flash may help add some light when absolutely necessary, but it may also bring in a set of its own problems. Do not treat it like the panacea which it is NOT!
Red Eyes
This has been a long-standing problem with flash photography.
As you already know, there are many blood vessels inside our eyes. Well, blood vessels are present all over our bodies but nearly all of them are covered with something opaque. This is not the case with our eyes, which are transparent.
When the bright light emanating from the flash hits the blood vessels of the eyes, it makes it look red. It’s that simple.
So how can you remove Red Eyes from your images?
- The easiest way is obviously NOT to use the flash in the first place. If you can scrape together some light from any other source, do it.
- If adding in more light from some other source is not an option, try to change your shooting angle. The basic objective here is not letting the light hit the eyes directly. You may ask your subject to look away from the camera or find them a better posture.
- The main problem with the built-in camera pop-up flash is that it is aimed straight towards the subject in front of it. This makes the light hit the blood vessels in the eyes directly causing the problem to flare up. One solution to this could be using an external flash unit.
- External, hot shoe attachable flashes generally have an adjustable head that could be turned and twisted to change the direction and intensity of the light. So instead of shooting the light straight into the face of the subjects, it could be bounced off of a large wall or reflector thereby bypassing the problem completely.
Flash On, Still Dark Images
Only one question, is your subject very far away?
Yes, right?….. That my friend is the problem.
You see, when you fire the flash, what you are actually doing is shooting the subject with some light. The light hits the subject and some of it reflects off him and comes back to the camera. The camera then captures this light and creates an image out of this.
You would notice here that in order for the flash to work its actual purpose, two conditions need to be fulfilled:
- The subject should be within the range of the flash.
- The light reflecting off the subject should have enough power to return to the camera.
If any of the two conditions above are not met, the flash would not do its job well.
Example time:
Stop daydreaming. No, your puny camera flash cannot light up the moon and make it look bright. The light would never reach that far.
If you want to shoot some subject, make sure that the subject is close enough for the flash to reach it. If the image still comes out dark, reduce the distance between the subject and the camera. Move closer rather than zooming in.
The range of the pop-up flash is also constrained in its width. In other words, it can only cover up to a certain length. If the subject(s) fall off this range, the problem comes back again. This happens most of the time when you are trying to photograph a large number of people, and all of them are standing in one line. People at the periphery would have almost no light coming to them from the flash unit.
Finish
I hope you have found the solution to the chronic problem you have been facing for a long time now.
If I missed something or did not mention the problem you have experienced, please post them below. I will definitely try to help you out with it.
Thank you for reading this long post.
Keep shooting beautiful!
