Did you ever want to dip your toes into macro photography only to be shocked beyond oblivion by the price of a good macro lens and never again ventured in that direction?
Then this post is for you!
This is one of the cheapest ways to shoot macro images, using your already existing lenses.
Yes, you read that right, you do NOT need to buy any specialized, expensive macro lens. We are going to modify the lens you already have (be it a kit lens or a prime lens) and prepare it for some macro action.
Sounds good?
All you need is a good set of macro/close-up filters.
What Are Macro Filters?
Let me first ask you this, are you a reader? I mean do you read books often?
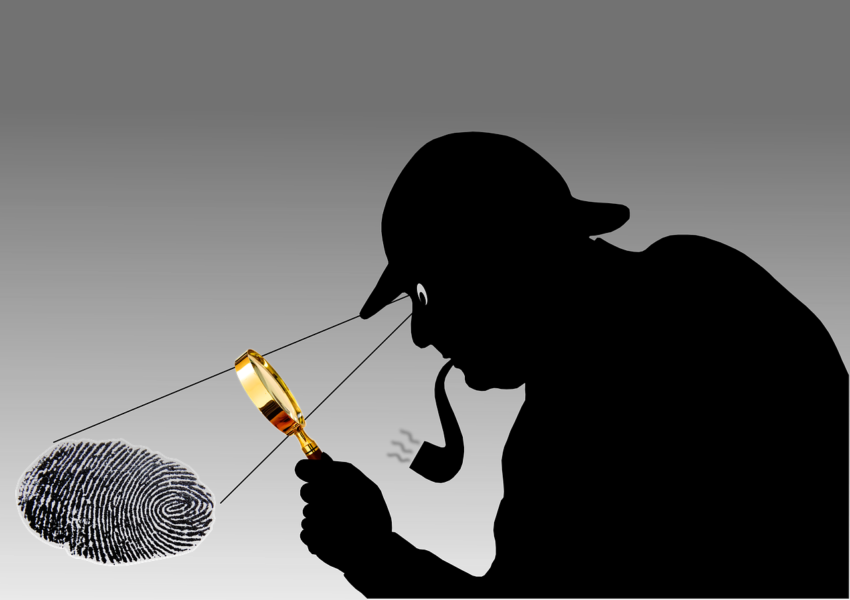
Even if you are not, I am certain you have come across a certain gentleman called Sherlock Holmes, right?
The famous fictional Conan Doyle sleuth who solved impossible crimes using his impeccable sense of deduction.
You remember now?
Well, he used to use a magnifying lens to find clues that no one else could see.
Macro filters are nothing but magnifying lenses designed for our cameras. They just magnify the image they are currently looking at.
They look very much the same as a regular Neutral Density filter (ND filter) or a Polarizing Filter (CPL) and can be screwed on top of any lens, as long as the thread size match of course.
How Do I Find Out The Correct Thread Size Of My Lens?
The thread size of any lens is generally mentioned at the back of the lens cap, usually next to a “∅” symbol. If, in any case, you cannot find the number there, it would either be written on the lens barrel itself or on the front element of the lens.
I should mention this here, you need to select a particular lens that you want to use with the closeup filters before you place an order for a set. This is because, as you can see, the filters would only fit the corresponding lens which matches the thread size.
Which Filters Should I Buy?
Get this straight. Macro filters are never going to be as good as dedicated macro lenses in producing magnified images of tiny subjects.
In all probability, the images the filter produces would be much softer and less sharper as compared to an image produced using an actual macro lens.
Moreover in certain cases where the quality of filters used is extremely bad, the resulting images may also develop distracting artefacts, chromatic aberrations, or even color fringes.
Close-up filters are not a substitute for actual macro lenses. This is just to help you get the taste of shooting macro photographs without having to bear a huge cost for it upfront.
Keeping all this in mind.
Try not to get the cheapest macro filters you can get from an online store. Go with reputed manufacturers such as Hoya, B+W, or Polaroid.
If you want to be extra careful, you could also buy Nikon or Canon made filters but they cost double (if not more) in most cases and I personally would advise against them.
How Does It Work?
First, let’s clear up the name a bit.
Even though the name has a ‘filter’ in it, in essence, the lens does NOT filter out anything. Its only job is to magnify the image it is currently looking at. Nothing else.
Oh yes, about how it works…..
The primary way a closeup filter works is by reducing the minimum focusing distance of any lens.
Minimum Focusing Distance
This is the minimum distance the subject needs to be away from the sensor plane for the camera to be able to focus on it.
If you have a lens which shows the focus distance scale on it, the smallest number on it is the minimum focusing distance. You can Google the lens you have to know exactly the minimum focusing distance for your particular lens.
Generally longer the focal length of the lens, greater is the minimum focusing distance.
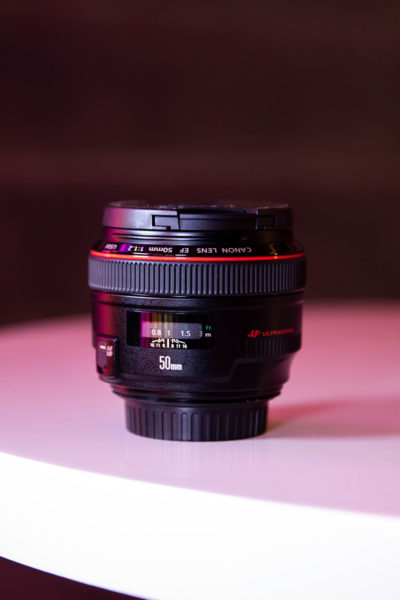
For example, the minimum focusing distance of my Nikkor 50mm, f/1.8G is 0.45m.
This means that the camera cannot focus on any subject which is closer than 0.45m. That is just how light works.
Note: An important thing to keep in mind here is that the distance is measured from the sensor plane of the camera NOT the tip of the lens. Please don’t make this simple mistake.
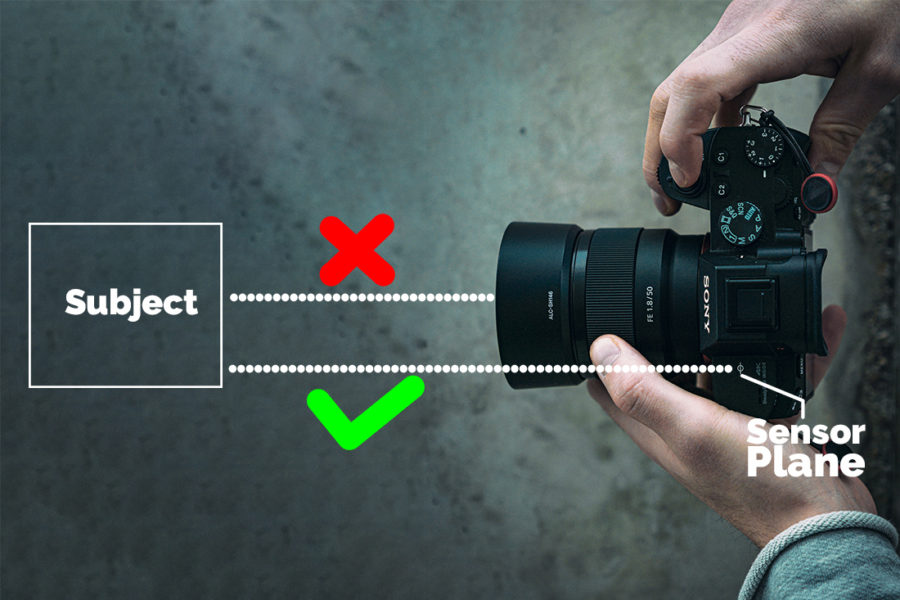
The sensor plane of your camera is marked on the camera body with a symbol which looks like this “φ”. Imagine a plane over this symbol and this is from where you should measure the distance to your subject.
Now that we cleared up the meaning of minimum focusing distance, let’s continue.
Like I was saying, the macro filter works by reducing the minimum focusing distance of the camera thereby letting the camera get closer to the subject than was possible otherwise.
This is actually what makes the magic happen and lets us shoot macro images.
Macro Filter Packs
Nearly all macro filters come in a pack of three or four. Each with different power of magnification, usually denoted as +2, +4, +10 diopter, etc. People who use reading glasses would probably be able to relate.
Larger the magnification number on the filter, closer you can get to your subjects, thereby producing greater magnification.
One easy trick to get an even greater amount of magnification than the filter with the highest magnification number allows is to simply stack filters on top of another. You could first attach say a +4 filter on your lens and then screw on top of the +4 filter another +2 filter. Both the filters will combine to give you a magnification power of +6.
The math is simple in this case.
But the increased magnification comes at the cost. The cost of depth of field.
You see, for any given aperture value, the depth of field is inversely related to the magnification of the subject.
In other words, greater the magnification, shallower the resulting depth of field for the same aperture value.
In this context, I hope you already know the innate relation between Subject Distance and the Aperture value. If not, I highly suggest you give this a quick read: Subject Distance & Aperture Value | This Is What Every Photographer Should Know.
Things To Remember
- Stacking macro filters on top of one another is an easy and inexpensive way of gaining more magnification but it sometimes may degrade the quality of the image taken. Since the quality of the optics used in these cheap filters is not very high anyhow, refrain from stacking more than two at a time.
- Unlike Reverse Lens Macro Photography Technique, the autofocus of your lens should work just fine when you attach a close-up filter on to it. But since the depth field would be so shallow, you may have to go manual. If you have Focus Peaking in your camera, now is the time to use it.
- A tripod and a remote trigger may come in real handy to stabilize your shots and help keep your subjects within the narrow depth of field you have available.
- A macro filter not only changes the minimum focusing distance of the lens but also affects the maximum focusing distance. It is because of precisely this reason that once the filter is attached, you would NOT be able to shoot “normal” images with it anymore. The lens would simply not be able to focus much further away.
- Close-up filters come in two primary variants:
Single Element: These types of filters have just one element and are more susceptible to image degradation.
Double Element: As the name suggests, these close-up filters have two elements. They tend to be better than the single element filters as they focus a good bit on correcting optical defects and minimize them as much as possible. Double element filters are also known as achromatic close-up filters. - Macro filters in no shape or form affect exposure or viewfinder brightness. So you do not need to make any adjustments for this.
I hope you find an easy and cheap gateway to macro photography in macro filters. But no matter what, always do remember that their USP is their price and NOT their quality. In case you find macro photography exiting and want to pursue it further, invest some money in a real macro lens.
There is no reason now NOT to try out Macro Photography. Put on a macro filter or just reverse your lens and you will be off to the races. Take a day and see if you like it. You got nothing to lose anyhow, so why not give it a whirl?
Keep shooting amazing.
