If you ask me, understanding autofocus modes and their functions is a daunting proposition.
Especially so, when you are new to the world of photography and have next to no knowledge about all the camera jargon it uses to explain it.
There simply seems to be too many moving parts to keep track of and soon it becomes an absolute nightmare to even begin to comprehend what is going on.
And don’t think for a second that selecting “Auto” for everything is going to get you out of trouble.
Nope! Absolutely not.
In fact, if you do not know what you are actually doing, you may end up doing more harm than good.
So here I am trying to make it as easy as possible for you to understand the basic principles of camera autofocus. I would like to say this now that this post is intended for absolute beginners. It would only discuss the basic anatomy of how the autofocus (Af) systems work inside any modern digital camera.
Since I have to use some names for the various functions and modes, I would use the names used by Nikon and Canon respectively. If you have a camera made by some other manufacturer, I can assure you that the internal systems work in quite a similar way. They just have different names.
So let’s get rolling now…

Focus
Focusing is a major major part of photography.
After exposure, it is probably THE most important aspect which determines the aesthetics of the image you take.
Put simply, there are two ways to focus for an image.
- Manual Focus
- AutoFocus
They are pretty self-explanatory.
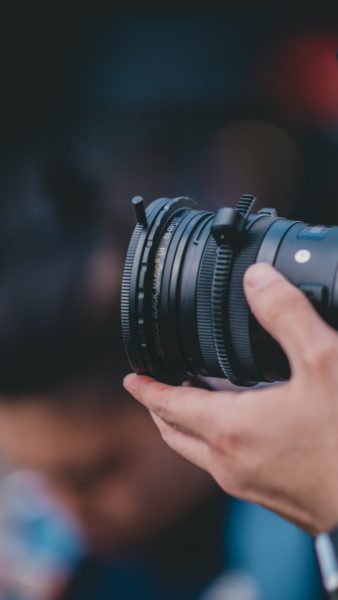
Manual focus is when you do NOT let the camera control the focus for you and use the focusing ring on your lens to focus on your own.
AutoFocus is when you let the camera focus for you. ‘Auto’…automatic. Yeah, that’s the play.
You are lucky to be born in a period where you can live even without knowing what manual focus even was. Anyhow, this is the major divide between the ways you can use to actually focus for the images.
Autofocus
Now that you can just press a button and ask your camera to focus the camera for you, there comes a need to be able to control it.
Let me give you an analogy to make you understand this point a little better.
Say you have a car which has just one pedal in it. If you press the pedal the car moves in a straight line, forward.
Now think, would that be enough?
No, right?
Because you need more control over the ability of the car to move, to be able to use it practically. In a very basic sense, you would need a steering to give the movement a specific direction, gears to break down the acceleration power into segments, brakes to slow down, etc.
In a similar way, you also need a hold over the camera’s autofocus to harness its true powers.
Focusing, An Overview
If you think about it a little closely, you will find that the process of autofocusing using a camera is a pretty straightforward process. It goes as follows:
- Find a scene that you want to photograph
- Determine the primary subject that you want to focus
- Align a focus point with the subject
- Half press the shutter button to focus
- Fully press the button to take the image.
So basically to focus, all you have to do is align a focus point with the subject and press a button.
What all the autofocus modes, that we are about to discuss below, try and do is control a few things:
- Position of the autofocus point(s) in the frame
- The point of settlement (when the camera stops trying to focus any further)
- Amount of area autofocus is used on
- Switching from one autofocus point to another
All in all, the target function of all these autofocus modes is to be able to give you the power to control an otherwise automatic system at a granular level.
But why do we need so many variations?
Because no two scenes are the same.
I think a very rudimentary answer for this would be, that the same camera body is used by many photographers for photographing many genres of photography. Some shoot static landscapes, some shoot extremely fast birds, some bought their camera to document their children growing up, others just shoot black and white street photographs.
Various subjects and various autofocus needs. It is from here that the requirement for all the different modes stems from.
Fair enough?
So looks like we have had quite an introduction here, let’s begin with the actual stuff now.
Autofocus Point(s)
Autofocus points are basically locations in the frame where the camera is capable of focusing. And in case you are wondering, no the camera cannot focus anywhere you ask it to.
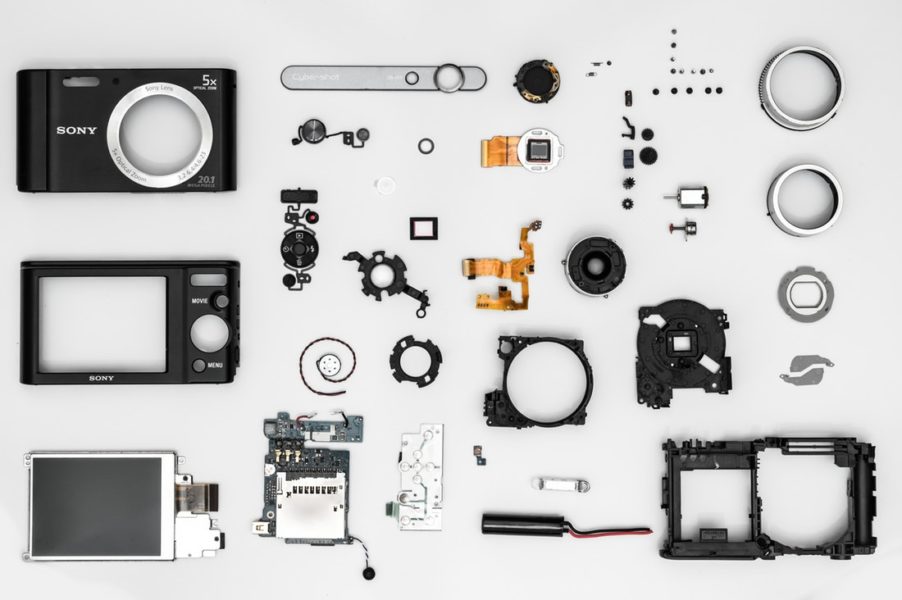
Every digital camera employs some type of autofocusing system to focus. Some use sensor-based systems (most Mirrorless cameras), others have dedicated autofocusing modules to take care of it (most DSLR cameras), or a combination of both.
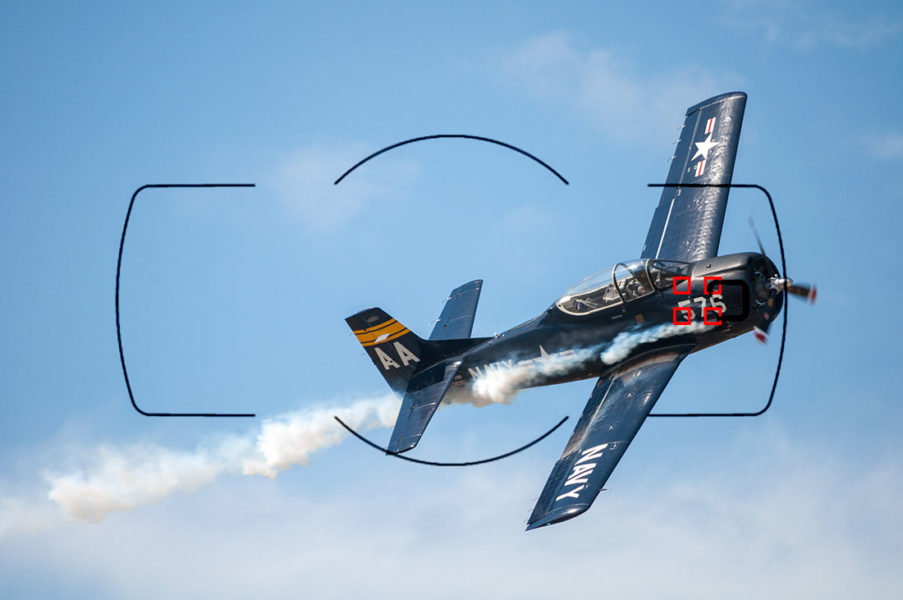
Now the entire sensor or the Af module is NOT capable of focusing anywhere in the frame. There are only a limited number of strategic spots where they have focusing sensors placed. Autofocus points are basically a representation of those points on the frame.
Through the viewfinder, it generally looks like tiny pencil drawn boxes, which when acquires focus turn red/green depending on the make and model of the camera.
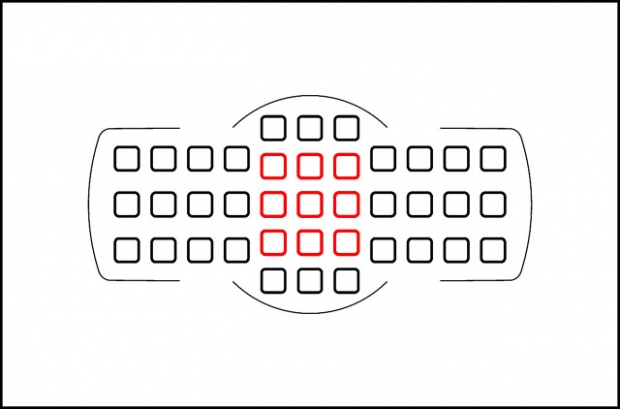
Looks familiar?
So like I said before all you have to do is align one of these autofocus points with the subject you want to focus on and press the shutter button halfway (I have a better way to do this, will discuss it later in this post).
Point Of Settlement
I am sure you have noticed that your camera starts to focus on a subject it is looking at only when you half-press the shutter button. That is because only then the camera activates the focusing mechanism to find a target.
You have initiated the camera to actively look for a focusable target but when should the camera stop looking for one?
To control this, your camera comes with three primary modes which control this aspect of focusing. If you find this part a little confusing, keep reading and it would be clear in just a minute.
AF-S or One Shot
Autofocus-Single (Nikon) or One Shot (Canon) is the name of the mode where the camera is instructed to focus on whatever is aligned with the autofocus point. Once the camera acquires focus, it locks it in until one of the two things happen:
- The photographer fully presses the shutter button to actually take the image Or
- He releases the shutter button fully
Let me give you an example which explains when this function could be used.
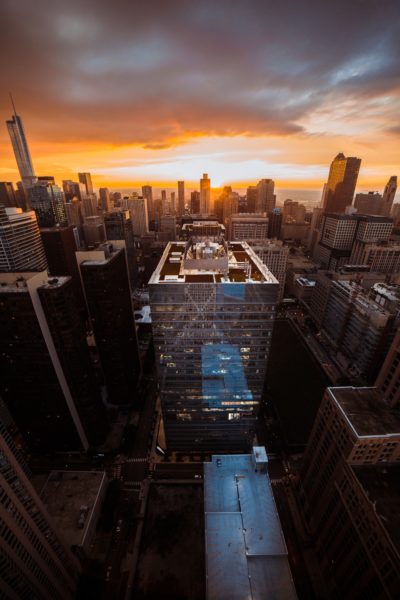
Just to be loud and clear, this function is best suited for static subjects, i.e., subjects with no movements. Landscapes and architecture photography lend themselves beautifully to this function.
Why static though?
The sole objective of this Af mode is to be able to give you a solid foundation for your focusing needs. Since the subject isn’t moving, the distance between you and the subject is constant. The name “single” or one-shot” is used to reflect the fact that the camera focuses only once.
Understand this very carefully.
The camera when pointed at a certain subject acquires focus only one time and then locks it in until one of the above two things happen. If either of the photographer or the subject happens to move, the camera doesn’t readjust focus which could result in a blurry, soft image.
Every new camera comes out of the box with this mode as a default. You may have heard a beep when the camera finally gets the focus. That is the sound to let you know that the camera has found focus and has locked it in.
Use: When photographing static subjects only.
AF-C or AI-Servo
Autofocus-Continuous (Nikon) or AI-Servo ( Canon) are focusing modes which allow the camera to continuously adjust the focus for as long as the shutter button is pressed halfway.
The name gives out the function of this mode pretty well. Basically, it is the opposite of AF-S/One Shot where the camera focuses just once.
Why do we need this?
When the subject or the photographer is moving.
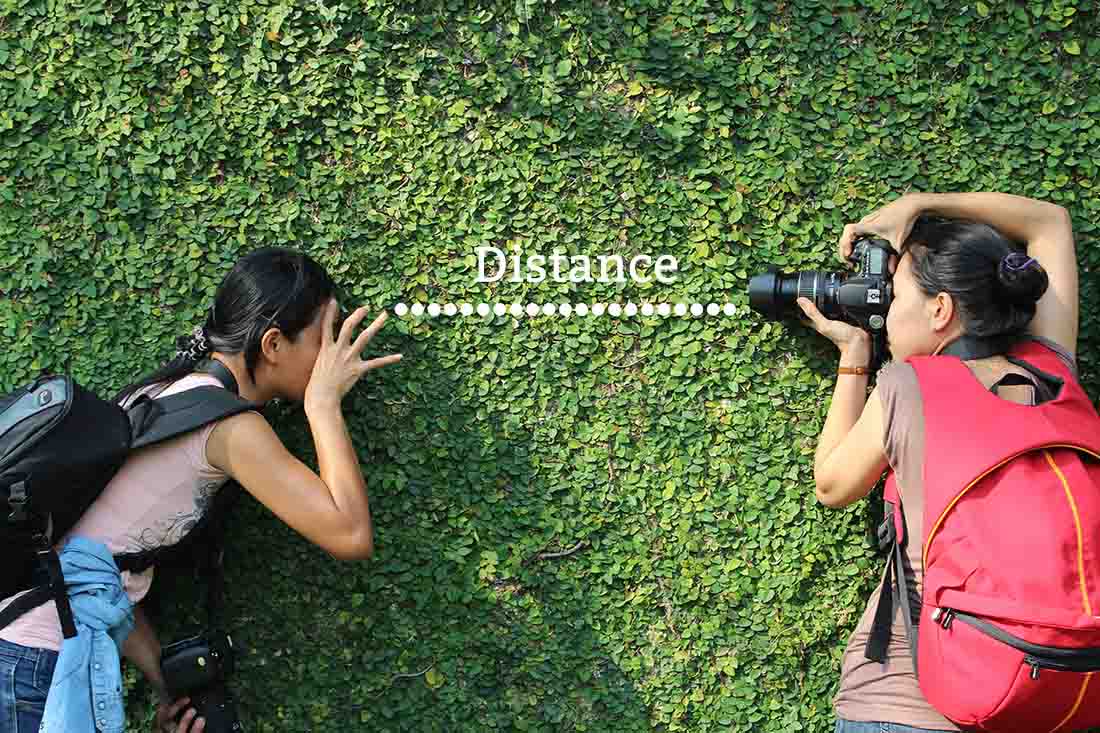
Get this clear and basic understanding of focusing once and for all. When trying to focus on ANY subject using any method (Manual or Autofocus), the thing that you are actually trying to do is tell the camera how far the subject is from the camera.
The distance between the camera and the subject is all that matters.
Depending on the amount of distance, the camera adjusts the internal optics of the lens to converge the light rays reflected from the subject precisely onto the camera sensor.
Anytime the distance between the photographer and the subject changes, the focus needs to change too.
It is as simple as that.
So I believe now you have a pretty good idea why we need something like an Af-C/AI-Servo mode.
With a subject which is moving, like say a flying bird or an athlete running, the distance between the camera and the subject is continuously changing. Think about this closely had you used Af-S/One Shot mode for this one, you would have missed focus every single time.
The camera would find the athlete once and then just lock in the focus. By the time you press the shutter button fully, the athlete has a new position which the camera hasn’t adjusted for. You miss the focus hence.
Af-C/AI-Servo mode helps you cope with this situation. When on this mode, for as long as you press the shutter button halfway, the camera keeps on adjusting the focus. It NEVER locks it in and you never hear the ever reassuring beep.
In a way when you select this mode, you are telling your camera to expect some amount of movement.
Use: When photographing subjects is in motion. Or when the photographer is moving himself. Like, say when trying to photograph a landscape from a moving bus. You get the point.
Af-A/AI-Focus Af
Autofocus-Automatic or AI-Focus Af is a hybrid solution between Af-S/One Shot and Af-C/AI-Servo.
This time instead of you determining when to focus and lock or when to keep adjusting focus, the camera steps up to make this decision itself.
Here is what this mode really does.
It is just an automatic switch between Af-S and Af-C. The camera looks at a scene and tries to determine if there are some moving elements in it. In case it doesn’t find any such elements, it uses the default Af-S/One Shot mode to acquire focus.
If, however, the camera finds some movement, it quickly switches to AF-C/AI-Servo mode where it continuously readjusts focus as the distance between the camera and the subject varies.
So instead of you making the decision when to use any of the prior modes, the camera tries and makes the decision for you.
To be really honest, I would not advise you to use this mode at all. In all this while since I have taken up photography, there really seems to be no time when I did not have a prior idea if my subjects are going to move or not. Letting the camera make such a crucial judgment for me seems more like a gamble.
In case it misjudges a scene, you may lose the shot altogether.
It’s just easier to tell the camera yourself.
Use: When too tired or lazy to choose an autofocus mode yourself.
Autofocus Area Modes
Now that we have a good idea about when to choose which autofocusing mode to be able to capture static and moving subjects, next comes the question about frame coverage.
How much of the frame is to be used for autofocusing. Telling you more about it is the best way to introduce you to the system.
Single Point Af/Manual Af Point
Single Point Af (Nikon)/ Manual Af Point (Canon) is the name given to the autofocus function which uses only ONE point to autofocus.
Remember how I discussed before that to be able to autofocus, you need to align the subject with one of the Af points and then press the shutter button halfway (yeah, I remember that I promised you an alternative way to do this, but you need to understand this part first).
When you use this function, the camera uses just a single autofocus point to focus. Doesn’t matter how many autofocus point your camera actually has.
Why is this a good idea?
Well, for one thing, it is much faster and accurate.
Secondly, it is much easier to target the subject using the one Af point. An easy example will explain it all.
Say you want to photograph an image of a caged animal at the zoo. Since the cage lies in between the camera and the subject, the animal inside, there is no way for you to avoid it. The best you can probably do to handle this case is to use single point autofocus. Aim at the animal and take a shot.

The camera will only focus on whatever is aligned with the single autofocus point you have activated. Since you don’t have to worry about managing multiple focus points here, all you have to do is place the animal in the same position as the Af point and press the shutter button.
The camera should easily be able to keep the cage out of focus and make the animal pretty distinct in your image. Since all the processing power of the camera is used to manage just one single point, the camera is a bit quicker to focus too.
Dynamic Af/Af Point Expansion
Yes, you guessed it. This time we have an autofocus function which uses multiple autofocus points, all at once to find and acquire focus.
I want you to look at the layout of the autofocus points first so that you have a seed on an idea.
So basically 9 autofocus points in a group work in tandem.
One thing though that you should know at this point is that the central Af point (not the central point of the entire frame but that of the group) is given priority.
So whenever you align any subject using the group of autofocus point which is not activated, the camera first tries to acquire focus using the center Af point. Only when it fails to get a solid grip, or if it does get a good grip but slips in between are the other neighboring aA points triggered and used to refocus the camera.
Fast moving subjects such as flying birds and wild animals are often quite hard to keep an autofocus point aligned with. It is extremely natural and likely that in the rush of thing you will occasionally miss the target. So the other surrounding autofocus points act as a secondary/supporting level which helps in acquiring or reacquiring focus.
Both Single Point AF and Dynamic AF work on the basis of manually selected autofocus point(s). This means that you as the photographer are required to choose a particular focus point for the camera to focus on.
In the case of Dynamic AF (Nikon)/ AF Point Expansion (Canon), the group of 9 Af points moves together. So you move all of them in a bunch.
You can always use more than 9 Af points when using the Dynamic Af function but it is not a very advisable thing to do. There are d9, d21 and d51 modes available but using them would spread out the Af points further. Making it even harder for the camera to choose the best one for the particular image.
Make it as easy as you can for the camera and use the least number of dynamic Af points you can.
Group Autofocus
Group Af is very similar to Dynamic Af but NOT the same.
In this case, all the 4 autofocus points move together but there is no hierarchy assigned. In other words, the center Af point is no longer given precedence over the others. All the 4 Af points together are treated as a single large autofocus point.
It works great when facing a low light or fast moving subject since the camera has a larger area to find focus from.
The only downside is probably that it tends to lock in focus on something which is nearest to it. So within the entire area which is canvassed by the 4 Af points, the camera tends to focus on the part nearest to the camera within that.
Auto-Area Af/Automatic Af Point Selection
If you are feeling a little overwhelmed right now, I do get it. It is a lot to swallow in one go.
You will have to probably read this a few times to understand it perfectly. Making the changes on your camera as you read about them and taking a few shots should help accelerate the learning process a lot more.
Anyhow, I digress.
Getting back now.
Auto-Area Af (Nikon)/Automatic Af Point Selection (Canon) is exactly what it sounds like.
Until now you were responsible for selecting the primary focus point from all the other points available on your camera. So essentially telling the camera to either focus using just one point (Single Point) or give it a definite direction (Dynamic Af and Group Af).
When on Auto Area Af, the camera automatically selects the autofocus points for you and focuses the camera.
Yeah, that is a lot of “Auto” to play with.
Both Nikon and Canon say that they use skin tones and face recognition to find suitable subjects within the frame. Personally, this mode doesn’t really bode with me very much since I do not want to let my camera decide where to focus at all.
For all I know it is as arbitrary as hell. Being a photographer I simply cannot let the camera take such an important decision on my behalf.
3D Tracking
This is a Nikon only function available on most mid-range and pro-level bodies.
3D autofocus uses color data of the scene to focus on the subject and track it through the frame. To be frank, this is more complex than I care to know.
I tried using it a few times, works but is not the best. I wouldn’t risk my images depending on this.
Since color is what the tracking function is based on, it really struggles when the subject and the background have similar shades and color tones.

A Final Few Things
- Any camera that uses some form of autofocusing system is highly dependent on the amount of light available in the scene. Because light is what is used to gauge focus in the first place. You will find that it is always easy for your camera to find focus during the day in the sun as compared to some night, low- light situation.
- For reasons stated above, the focusing system works better with larger apertures (smaller aperture values) since they allow more light to enter the camera. If you have a kit lens read 6 Reasons Why The Nifty Fifty Is The Next Upgrade From Your Kit Lens. It really is a cool lens to consider as your first lens upgrade.
- The one technique I promised at the beginning of the post as an alternative for pressing the shutter button halfway is called Back Button Focusing. After reading this article through, you are now ready. Read it here Back Button Focus | Control Your Autofocus Like You Never Have. I never looked back once I started using it years ago.
- ‘Single shot’ is NOT the same as ‘Single point’. Please do not get confused between them. Always remember, Shot = Image
- Point=Autofocus Point
- When using the autofocus system on your camera, do NOT adjust it manually AFTER the camera finishes acquiring focus. Unless your lens has a manual override system, the internal motors of the lens which actually move the optics inside the lens can be damaged. Stay away from the focusing ring.
- The release priority settings mean as follows:
- Focus: Only allows taking an image when the camera has a strong focus grip. Unless you have that, the camera simply wouldn’t take an image.
- Release: Not considering the focus at all, the camera simply takes an image whenever the shutter button is fully pressed. There are no other conditions.Release + Focus: Is an amalgamation of both the above functions. The camera tries to reconcile the speed of release mode with the added security of the focus mode. Generally, the camera drops the frame rate a little bit to adjust for the added focus lock. Not my recommendation. Use one of the other two release modes depending on your style of shooting.
Conclusion
The autofocusing systems on any modern digital camera these days are so feature packed because they are actually needed in the real world to get some top-notch photographs.
I know after reading this article for the first time it seems like a complete jungle  but as you use them more and more, the functions and their necessities will be evident. Trust me they are not there for nothing.
Autofocusing and the recipe used are a highly subjective topic which is very dependent on the photographer’s style and the genre of photography. What works for one may be completely out of place for another. To figure out your own unique mix you have to experiment a little. I wish there was some simple way out but there isn’t.
And please don’t try and use those ‘Auto’ modes. I mean…please!
If for any reason you get some blurry, unsharp images, read Want Sharper Images For Life? This Is How You Do It to troubleshoot your problems.
Have a great time shooting guys. I wish I have at least been able to give you a rudimentary understanding of what autofocus systems are and how they work without overwhelming you.
Keep shooting amazing.
If this article helped you in any way and you liked what you read, please take a moment to share it with someone who might benefit from it. It’s the best way of helping me reach more people. Thank you.
Hand Picked For You
 Focus and recompose is a technique used by many photographers to acquire focus f...
- Autofocusing systems on cameras today come with a lot of functions. For a new ph...
- Autofocusing systems on cameras today come with a lot of functions. For a new ph...
- Back button focusing is a way to reassign the autofocusing control from the defa...
- Getting sharper images out of your camera is much easier than it is made out to ...
- The P Mode or the Program Mode on modern digital cameras is a semi-automatic mod...

![The Only Guide You Need To Master Digital Camera Autofocusing [Part 1]](https://sp-ao.shortpixel.ai/client/to_webp,q_glossy,ret_img/https://www.aperturebuzz.com/wp-content/uploads/2020/03/insung-yoon-MOo2R77mCZY-unsplash-300x201.jpg)
![The Only Guide You Need To Master Digital Camera Autofocusing [Part 2]](https://sp-ao.shortpixel.ai/client/to_webp,q_glossy,ret_img/https://www.aperturebuzz.com/wp-content/uploads/2020/03/daniel-cheung-dDppsuM_UpE-unsplash-300x200.jpg)


