Even with the advent of faster, more accurate, and smarter autofocusing systems that all the new DSLR and Mirrorless cameras come packed with these days, the way we autofocus our cameras is far from perfect. Don’t get me wrong; I am NOT saying they are not good. Not even for a second. They are, in fact, great but there are certain things that you still yearn for and which needs to be improved.
Until that happens, we could always use some workarounds to make the best of what we have today.
Focus and recompose is one such workaround that was devised long ago when autofocusing on a camera was the new kid on the block.
Focus And Recompose
Focus and recompose is a technique used by many photographers all over the world to acquire focus primarily using the center autofocus point on the prime subject of the image, and then recompose the frame before taking the image.
That is all focus and recompose is. It is exactly like it sounds.
Didn’t completely get it?
Let me explain it in a little more detail then.
You align the center autofocus point with your subject, acquire and lock your focus, recompose your image (since you had to adjust the composition in the first place because you had to keep the subject at the center to use the center autofocus point) and then just take the shot.
Easy, right?
But it might be a pretty normal thing for you to ask right now why on earth would anyone go through all this just to find focus?
Good question.
For finding the answer though, we have to go a little deeper.
Old Ritual
Focus and recompose is a technique which was developed by photographers when the first cameras with autofocusing capabilities came into existence. Basically, a long time ago.
What happened is this.
Since the autofocusing system was in its infancy then, it was pretty unreliable and hard to use. There were only a handful autofocus points on it for the photographer to use. In some cameras, there was only a single autofocus point at the center (unlike cameras today where there are more than a few hundred).
As time went by, the autofocusing system matured. It was now getting pretty accurate but the number of AF points it offered was often just a low two digit number. In other words, there were only a few specific positions in the frame where the AF system could be used effectively.
But no one can take images like that!
You just can’t place your subject smack bang in the center for all your shots. If you remember right, that even goes against the primary ‘rule’ of composition we have in photography called the Rule of Thirds.
Enter focus and recompose.
This technique of focusing was basically a workaround the limitation of the number of focusing points and the time it took to shuffle between them.
Let me give you a hypothetical example that would flush out all doubts at once.
Example
Let’s imagine we have just the center autofocus point to play with.
And now for some reason, you want to take the image below.

I am sure you have noticed that the focus of the image is NOT at the center of the image on the towel lying on the table. The focus is roughly around the hour hand of the clock near 11 o’clock.
If you had a camera which could focus only at the center of the frame, how would you take such an image?
Photography is all about creativity brother, think think!
Let me deconstruct the process of autofocusing a little bit.
It is actually as simple as it gets.
Every camera has a few autofocusing points built into its system. Depending on the make and model of camera you have, they are either going to be more or less in number. All you have to do to get something in the frame in focus is align an autofocus point with the subject in the frame, half press the shutter button and voilà, you have the focus locked and loaded.
What could be more easy, right?
But there are two main problems which would eventually creep up if you use it long enough.
- Autofocus point and subject alignment mismatch: What if, like the image above, the autofocusing points you have on your camera simply doesn’t match up with the portion of the frame you want to focus on when you compose your image?
- The time required to shuffle through the individual autofocus points: You would think increasing the number of AF points will solve all the problems, right?…well not really.

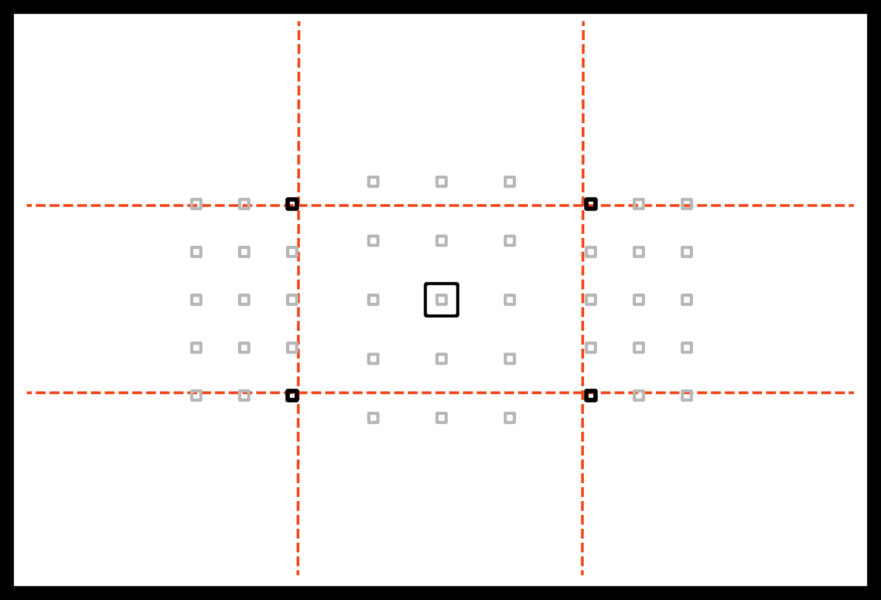
Say you have a 1000 autofocus points laid out uniformly all over the frame. You just took an image of a bird sitting on a branch. Complying with the rule of thirds, you did not place it at the center but rather at the right bottom corner. Suddenly the bird starts flying. You now want an image with the bird at the top left of the frame. Before you select and activate the autofocus points located at the top left corner of your frame using the D-pad, the joystick or whatever you have, the bird will safely reach the north pole. You have a 1000 AF points all over, remember? So going from one corner to the other will at least require 500 punches on the D-pad for you to shift it. Not so optimal, is it?

Solution
The answer that early photographers who faced the shortcomings of the system came up with was simple enough.
It was just this.
Instead of aligning the autofocus points with the subject, align the subjects with the Af points. Seems nearly identical but is not so.
The solution written down in steps would look something like this
- Find a suitable scene to photograph
- Locate the subject
- Forget about composition and just place the autofocus point on the subject and use it to autofocus
- Once the focus is acquired, lock it in and then compose the shot
- Take the image
- Enjoy!
With the clock image problem I posed to you earlier, even if you had just a single Af point on your camera, you could use the focus and recompose technique to get exactly the shot with the focus off-centered on the hour’s hand.
All you have to do is place the Af point of your camera on the clock’s hour hand, half press the shutter button (I have a better option than doing this, will discuss more about it in a minute) to find focus and then keeping the shutter half pressed, re-compose the image to get the clock and the coffee mug both in the frame at the bottom left and top right corners respectively and then just take the image.
Easy? Told you…. you’d master it in a couple of days. It isn’t rocket science guys.
For and Against
Now that you think that focus and recompose is the messiah you have been waiting for all your life, let me just gently burst your bubble to tell you that it isn’t as dreamy as it sounds.
Like any other techniques and procedures in photography, opinions about the focus and recompose technique is also highly subjective. All I intend to do here is present both sides to you.
You are more than welcome to try it out and see if it fits your shooting style or not. However, let me just tell you this. As you will find in the discussion below, the technique neither works for all nor for all situations. So even if for certain circumstances it gives you bad results, for some other situations it might be an absolute God sent.
My only advice to you would be to understand the strengths and weakness of the technique so that you can implement it where it works the best for your own style and genre of shooting.
Doesn’t Work With Moving Subjects
Focus and recompose is a technique which is highly dependent on the fact that the elements of the scene hold their positions for long enough to let the photographer recompose the image in the first place.
If I assume that the photographer only uses the center autofocus point to focus on the subject and if the subject is NOT moving parallel to the photographer, it is highly unlikely that the technique could be used effectively at all.

Think about it this way. As a photographer, you first achieve your focus and then recompose your image. For the image to look sharp, the focus should hold for the duration of time it takes for the recomposition. If the subject shifts its position too much, so as to functionally be out of the plane of focus, the image would automatically turn out to be blurry and unsharp.
If you employ a sufficient enough depth of field using a large aperture value or by increasing the subject distance you may get a little larger latitude. But there is still the danger of getting out of the safe zone looming in the background should there be much movement.
This especially true when the subject is either moving towards or away from the camera. That is when the autofocusing systems really have to work hard to keep it together.
Half Pressing The Shutter Button
Acquiring focus and keeping it locked down while you are recomposing the image by holding the shutter button halfway can be a little problematic. Especially if you are a novice who just started taking pictures.
Once you get the hang of it, it becomes a lot easier, I suppose. But initially, it is not such a great option.
In case you slip and accidentally release the button, even slightly. By the time you finish recomposing the image, your Af point is located at a completely different area of the frame. You run the risk of misfiring the focus and ruining the entire image as a result.
On the other hand, if you press too hard, the shutter fires and you are left with unintended images. Oh by the way once this happens you have to re-acquire the focus, re-recompose keeping the shutter half pressed all the way. Good luck with it.
You could use the AE-L/AF-L (AutoExposure-Lock / AutoFocus-Lock) button located at the back of the camera to lock your focus and exposure. But it is just substituting the shutter button with another one.
I have an easier option though. Like I promised earlier.
Its called Back Button Focusing (BBF). Sounds much fancier than it is. All it does is take away the focusing functionality from the default shutter button. You no longer use it to focus anymore. And it reassigns a button at the back of the camera to use just for focusing.
It is absolutely safe in case you are wondering and if you don’t like it, you can always revert. Read Back Button Focus | Control Your Autofocus Like You Never Have to understand it in all its entirety.
May Actually Miss Focus
The one thing that the focus and recompose technique seeks to accomplish, is faster autofocus.
Unfortunately, sometimes that extra speed may come at the cost of accuracy itself.
When shooting with relatively smaller aperture values and/or using longer lenses over short distances, the depth of field becomes really small. If during the recomposition of the frame the subject is somehow displaced away from the plane of focus altogether, the resulting image will be all blurry and unsharp.
Most portraits are shot just this way. Small aperture values, long lenses (85mm or a 70-200mm lens are common) and short subject distances.
The margin for error is so low in these cases that even a slight movement may cause the camera to focus on something totally wrong. You seriously do NOT want that to happen to you.
On the flip side though, the above case represents only a small percentage of the shots in the real world. If you are shooting macro images or using low aperture values which generate a depth of field of only a few millimeters then it might be a problem
Otherwise, focus and recompose is an absolute gem to have.
If you can purchase a good amount of depth of field and while recomposing move as little as possible, there is no imminent danger at all. In any way, when you focus on the subject first, the subject is already there in your frame. All you do later is just place it differently.
Cross-Type Autofocus Points
Yeah, I used this term a lot in the paragraphs above. Let me just explain them a little bit here.
All the autofocus points on your camera are NOT created equal. There are primarily two types:
- Normal
- Cross-type
Here is a video from ZY Productions which explain the differences beautifully.
Now you have to probably look into your own camera manual to find out how many Normal and Cross-type autofocus points you have on your camera.
The reason why I asked you to use the center Af point is because most of the time that is one which is a cross-type. It means it is better equipped to latch on to the phase differences and acquire focus much faster. If no other Af point seems to work as well as you want it to, always remember to give the center Af a try. In most cameras, it does pretty well even in low-light conditions.
Final Words
I personally use focus and recompose most of the time. Mainly because it suits my style and genre of shooting.
It might not suit yours, but I am just asking you to give it a shot. Wouldn’t hurt to try.
Let me know how you found it and whether it actually made your focusing faster or less accurate.
Please do consider sharing the article, if you liked it and think it might help someone else.

What do you recommend using when photographing kids who move around a lot and you want to compose in camera?