Cracking open that fancy new DSLR or Mirrorless camera that you had saved up for the better part of a year just to clean a teeny tiny speck of dust may seem like a daunting affair. Maybe that is why, every now and then, I find even people with entry-level cameras running around their camera manufacturers just to get their cameras clean. Don’t get me wrong, I appreciate the fact that you love your cameras and want to keep it pristine. It’s just that I don’t think it makes any sense to spend almost a quarter of the camera’s retail price every time you need it cleaned.
But have no fear, Aalok is here!
In this article, I am going to tell you how to get your cameras clean as a whistle and keep it that way for a looooong time. You guessed right, it is going to be for a fraction of the cost professional cleaning solutions would charge you. And before you ask let me assure you, YES!…yes it is absolutely safe. Unless you are on drugs and have completely lost control of your limbs, it is safe as houses.
Sounds too good to be true? Give it a read and then you can be the judge yourself.
Let’s get on with it, shall we….?
Supplies
We are now in for a full 360 degrees, complete clean. We will clean out any dust, grime, fingerprints from the inside out. The supplies list, however, isn’t too long. All you need are these:
- Few hand towel sized microfibre cloths
- Lens cloth
- Rocket air (with a filter)
- Sensor swabs
- Cleaning fluid
- Electrostatic brush
- Loupe (optional)
- Your steady hands
That is all. You can get all of these in one pack or get them separately as you please. I strongly recommend using Zeiss products, since that is the one I have used till now with pretty good results. If you have some other brand in mind, feel free to use them as well provided they are quality products.
A Word Of Caution
I don’t want to freak you out about this but you are going to venture into the inside of a very costly and sophisticated piece of technological marvel, aka your camera. Please do not cheap out on the quality of the products that you are going to use. As it is, the cleaning products are dirt cheap from quality manufacturers who have been the pioneer in optical imaging for very long.
Use any brand you want but whatever you do, do NOT buy those super cheap cleaning solutions and makeup brushes sold on Amazon in a single pack, labeled as ‘Camera Cleaning Kit’. Do consider the long-term ramifications of your decision on your camera’s health.
Use your best judgment.
Clean Environment and Workstation
Detaching your lens from your camera essentially opens up an airtight seal and exposes the insides of both the lens and the camera to the elements. To make sure that we do not add more contaminant into the camera in the quest of actually cleaning it up (which would be truly tragic), we need to make sure that we have a clean and contaminant free environment to work with.
Avoid dusty rooms or working near open windows. Clean your workstation well, before you start working on the camera itself. This might sound like a gimmick but the best possible DIY “clean room” you can create in your own home is in your bathroom. Run the shower on the highest temperature you can for a couple of minutes and voila, you have your own dust-free space to work in.
Maybe you already know this but the air all around us has millions and millions of tiny microscopic dust particles floating in it. If you have been in a room with even a tiny sliver of sunlight coming in through some small opening, I am sure you have seen the dust floating around. When you run a warm shower for some time, what you are essentially doing is using the water and the water vapor to weigh down these small dust particles. Thus creating a dust-free environment (at least for some time).
Outside In
Since the outside of our camera is invariably always dirtier than the inside, it is imperative that we clean that mess up first so as to not let that junk in when we actually open the camera up. The drill would be the same for the entire camera.
- We would first blow off the larger, more loosely attached pieces of dirt using the rocket blower (repeat as necessary)
- Use the electrostatic brush next to get into the small gaps and crevasses
- Wipe out the rest using a microfiber towel and the cleaning solution
- The image sensor would require a few additional steps. I will explain them in just a bit, hold on.
The Control
Before you start with the surgical operation on your camera I am about to discuss, you need to make sure that your camera actually needs it. The usual telltale sign would be tiny dark spots on ALL of your images in the same position. If you can see dark spots in the frame when looking through the viewfinder, but do not find anything on the image itself, you most probably have some dust sticking onto the mirror rather than the sensor (in case of a DSLR). So clean up accordingly.
To have a good starting point and a control to make comparisons with, you need to take a few images of a bright evenly lit object first. The sky on a sunny day does the trick for me. Make sure to use the smallest aperture you can (larger aperture value), like f/22 or more. This would ensure that the dust spots if any are as prominent as they could be and detectable on the image.

Next, import the images on any image editing software, bump up the contrast and the brightness, magnify the sections and start looking for those dark spots. This image would be the one that you would compare with when you are done with the cleaning to make sure that you actually did a good job.
All set now, let’s get to cleaning.
Camera Body and Lens
Personally, I use a combination of both a table and my trusty little tripod to help me hold the camera during the cleaning process. For this first step, I attach the camera to the tripod and start blowing wildly on the camera’s and lens’ outer surface with the Rocket Air Blower. Like I said before, this would remove any larger particles of dust making rest of the cleaning much easier.
Make sure you take the lens cap off and blow air all over it. The viewfinder is a major area where much of the dirt settles, cover that well. Once you are done, spray some cleaning fluid on a microfibre cloth and give the camera a good wipe down. Repeat the process a couple of times to be absolutely sure.
Okay before I forget to mention this, ALWAYS spray any cleaning fluid on the cloth and then clean using the cloth. Never spray directly on the surface, that is just asking for trouble.
Loosen your tripod, mount a little now and point the camera towards the ground. Detach the lens from the camera and put on the lens and camera cap as fast as you can.
We will return to the lens in just a bit.
Dry Contactless Cleaning
Next up we are going to clean the inside of the camera, the sensor cavity.
First, insert a FULLY CHARGED battery inside the camera and switch the camera on. Whatever you do, do NOT insert a partially charged or about to die battery in. If the battery dies, the camera would turn off and the mirror and shutter would come down abruptly which in all probability would cause serious damage to your camera’s internals. Fresh batteries it is.
Open up the menu and find the settings tab which says ‘Sensor Cleaning’ or ‘Mirror Lockup’ and engage it. A little twich later, the mirror should flip up inside the camera exposing the sensor behind it for you to clean. For mirrorless cameras, you can skip this step altogether since you have no mirrors to deal with.
Keeping the camera pointed down, open the cap. Now gently introduce the Rocket Blower in and give it a few puffs. Just make sure that you do not touch the sensor or even the side walls. This is intended to blow out any larger pieces of dust inside. The theory is, as the camera is pointing downwards any dust unsettled by the puffs of air should fall right out of the camera and not get further in.
The reason I asked you to get the Rocket Air Blower instead of any black generic blower is because it has a filter at the back which cleans out the air that comes out of it. Had this been not the case, you would have unintentionally actually pumped in more contaminants than there were in the first place.
A Little Contact Now
After the preliminary air cleaning, we take up the next step, an electrostatic brush. It sounds fancier than it actually is.
To understand how this works, just tear up a few extremely small pieces of paper. Comb your hair with a brush and then bring them close to the paper pieces but don’t let them touch. Do you see that? The pieces are attracted towards the comb…magic!!…Nope..it is actually just a little electrostatic charge.
We will now use this exact same phenomenon to pull the dust particles off the sensor.
Charge up the brush using the Rocket Blower (never blow on it yourself, your breath contains many things that you don’t want inside your camera). Now crouch a little and let just the tip of the bristles touch the sensor. In one single motion, give the sensor a light brush. Take the brush out, recharge it using the blower and go the other way now, i.e., if you went left to right previously, now go right to left. Repeat this a few times.
Keep in mind that you do not want to hurry this part. Take your time and do it as smoothly as possible. Do not apply any pressure on the brush at all, just let it glide on the sensor’s surface.
Dry cleaning done!
At this point, I would suggest you inspect the image sensor using the loupe. Use the different colored lights on it to find the dust particles which were previously there. If you find any, continue cleaning. If you don’t, switch off the cleaning mode, attach the lens and take a shot of the sky again. Do you see the spots still?
You never want to clean more than is necessary. Always try and stop the moment you cannot find those pesky little spots on the images. Don’t overdo it.
However, if you still got spots we need to up the ante.
Wet Contact
It is exactly what it sounds like. We use a wet swab to swipe the sensor clean…ah…yes…that is all.
I prefer to use the single-use sensor swabs which are individually packed and vacuum-sealed. This keeps them extremely clean and free of any potential contaminants. Just take one out and squeeze onto it two drops of sensor cleaning fluid on each side. You want it just damp, not dripping.
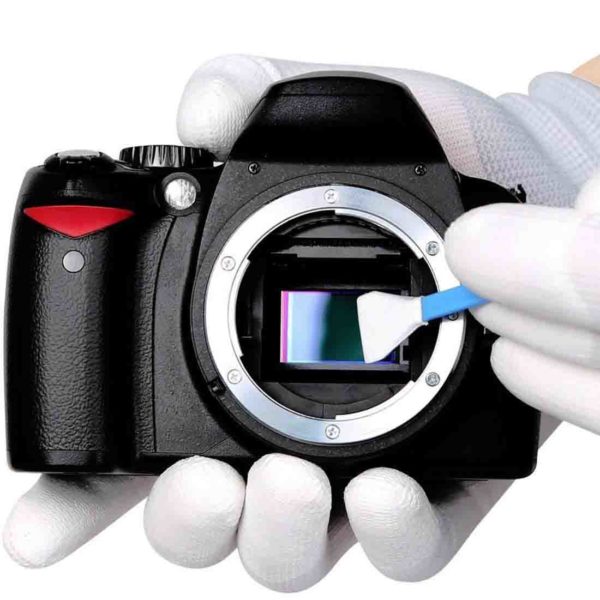
Just like the electrostatic brush, in one single motion, swipe the sensor in any one direction. When you reach the end, slightly lean the brush a little and swipe the sensor the other way. This ensures that each time you use the clean side of the swab and do not reintroduce the collected dust back on the sensor again.
Check with the loupe and if satisfied take another test shot. I am pretty confident the marks are definitely gone now.
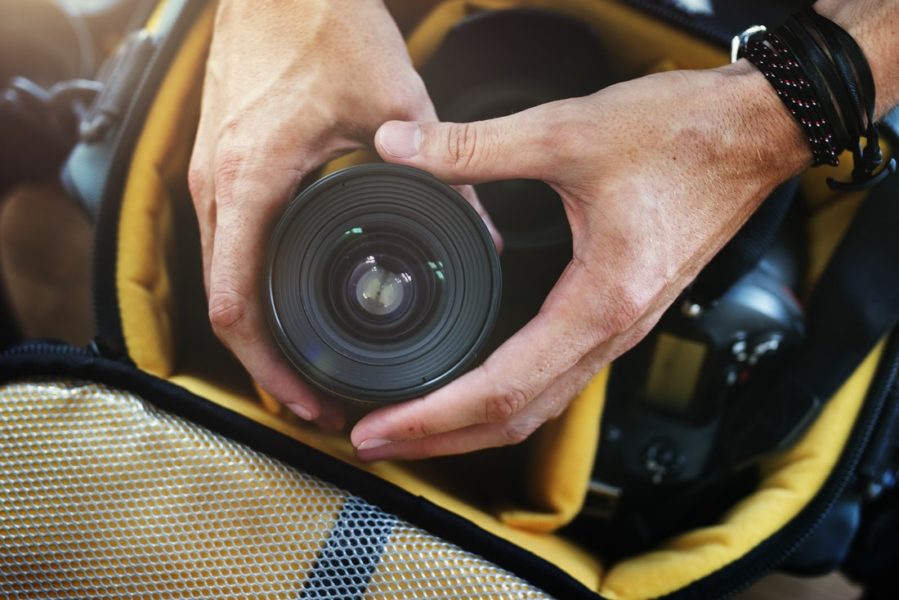
The Lens We Left Behind
You can use the same electrostatic brush and swab technique on the inner part of the lens as well. Just make sure that you use a clean swab to do this. Also, stop whenever you think it is clean. Before replacing the caps make sure you clean them as well, this is important.
For a little extra, you can always use a few sprays on a microfiber cloth and give the outer surface a good rub. Especially the focus and the zoom rings since those are the ones touched regularly and are most likely to collect grime and oil from your hands.
Insurance
Don’t be so afraid of cleaning the lens and the inner parts of your camera so much. Your camera manufacturer has in place a few safety protocols just to ensure that the really delicate parts of your camera are not damaged that easily.
Most imaging sensors have some form of a protective layer(s) on it to defend it from mechanical or physical damage. So whenever you clean your ‘image sensor,’ actually what you are doing is just cleaning the layer. Even some of the lenses have protective coatings on the outer elements which really makes them so much more safe from casual scratches and occasional bumps.
What I am trying to get to is, do not be intimidated by the prospect of cleaning your own camera. That being said you also need to understand that the internal parts of the camera are extremely, extremely delicate. Even though they have some lines of defense from minor accidents, you should take all necessary precautions to conduct the cleaning procedure in the safest possible manner.
Bonus Tips
Learning to clean your own camera is a very valuable asset to have. Even though you may have the money to send off the camera and get it cleaned by some professional service, often you may find the downtime unaffordable.
If you do this correctly, this DIY method should not take you more than 30 mins for you to complete. Also, you can do it anywhere in the world. All you need is just a handful of stuff which are dirt cheap and which you can carry with you wherever you go.
Here are a few more tips just for you
- Never ever use canned air to clean your camera. Some people say its okay to clean the outer surface but I am not one of them. Use the Rocket Blower instead. It is a lot safer.
- Always buy the sensor swabs which exactly fits the width of your camera sensor. Find out which size sensor you have (Full Frame or APS-C or Micro Four Thirds, etc) and get one that fits you.
- Even if it looks the same, do not buy cheap cleaning products off the Internet. They would ruin your camera and cost you a lot more in the long run.
- Whenever you change lenses in your daily use, make sure you always select a place which has the least amount of dust possible. You don’t want to change lenses on a beach…..seriously don’t!

- Also whenever you swap lenses, always keep the camera pointing downwards towards the floor. Before you put on the next lens, blast off some air into the sensor cavity using the Rocket Blower. This would help reduce the dust build up over time significantly.
- Always go around in circles when cleaning the front or the back element of the lens. Never apply too much pressure.
- Remember to clean the lens caps before you put them back on.
- Don’t forget to clean one of the most integral parts of the camera, the viewfinder.
Cleaned Up
That is all you need to know to get your camera squeaky clean. It wasn’t that difficult…was it? Cleaning your camera for the first time is like taking the first test. It would have its fair share of jitters and butterflies in your stomach but all that would fade with time.
So go ahead and clean that camera up. Let me know in the comments below if you face any problems following what I just told you, or if you need any more information on anything specific. I will get back to you as soon as I can.
Keep shooting amazing.
