The twirl effect is back in trend these days.
If you haven’t heard of it yet, you should definitely give this a quick read.
It is used to create kind of an abstract image with some twisted strands of brightly colored lines.
And frankly, I do understand why they have become so popular lately.
- You can make one with virtually any photo or image.
- It takes less than two minutes to make one.
- And the best part, it looks different every single time.
Even when you use the same image!
So, you interested?
Want to make one right now?
Follow along then…
First, you need an image. ANY image.
Fire Up Photoshop
The process of creating an interesting looking mesh of light fibers is as simple as they come. All we have to do is take an image and apply a few filters, a bunch of times.

That’s it. It’s that easy.
Ready then?
Open the image you chose earlier inside Photoshop.
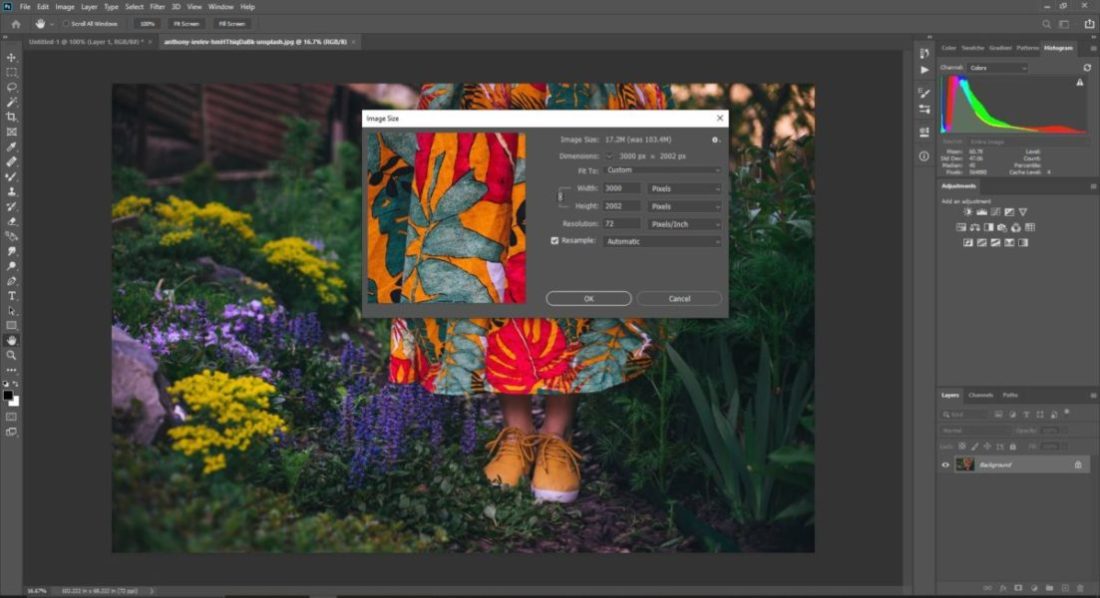
Just to make sure that the image we are using is not unnecessarily large, we need to adjust the image size. This is only to make the application of filters later on easy and quick for our computers.
Make your life a little easier and resize the image size to about 3000px on the longer side and let the height adjust automatically.
The image would be still sufficiently large to work as a high-resolution wallpaper or for a decent size print.
Go to Image > Image Size
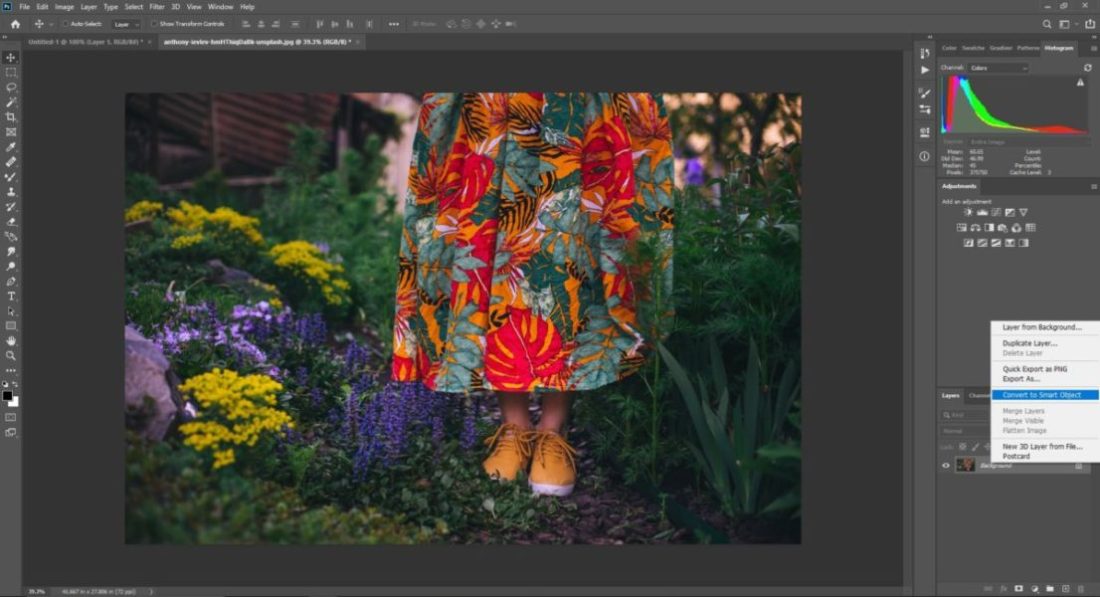
Now to make the application of filters non-destructive (retroactively adjustable), we need to convert the image into a smart object.
Right-click on the image layer and select ‘Convert to smart object’.
Ready For Filters
Now comes the fun part!
Now we apply the filters to the image. As many as we want and then play with the settings to our heart’s content.
I am going to tell you the way I made the image above. You may, of course, use this process if you like. Or you may go your own route and make something which looks even better.
Okay, so we need to pixelate the image first. Go to Filter > Pixelate > Mezzotint
This will just make all the colors in the image look like small blobs all over the canvas. There are many options to choose from, I frequently use ‘medium lines’ and ‘coarse dots’ for this.

After applying this filter, you should find a small down arrow next to the layer tab. Clicking on this will reveal the filters you have applied to the image. As of this point, we should see the ‘mezzotint’ filter there.
Like I said earlier, since we converted the image into a smart object, we can apply the filters and then change their value and settings anytime we want. So don’t worry too much about the values you use.
Now let’s apply a radial blur. Go to Filter > Blur > Radial blur.
Crank up the Amount to 100 and choose the Blur Method as zoom. You can use any quality you want. Generally ‘good’ works just fine.
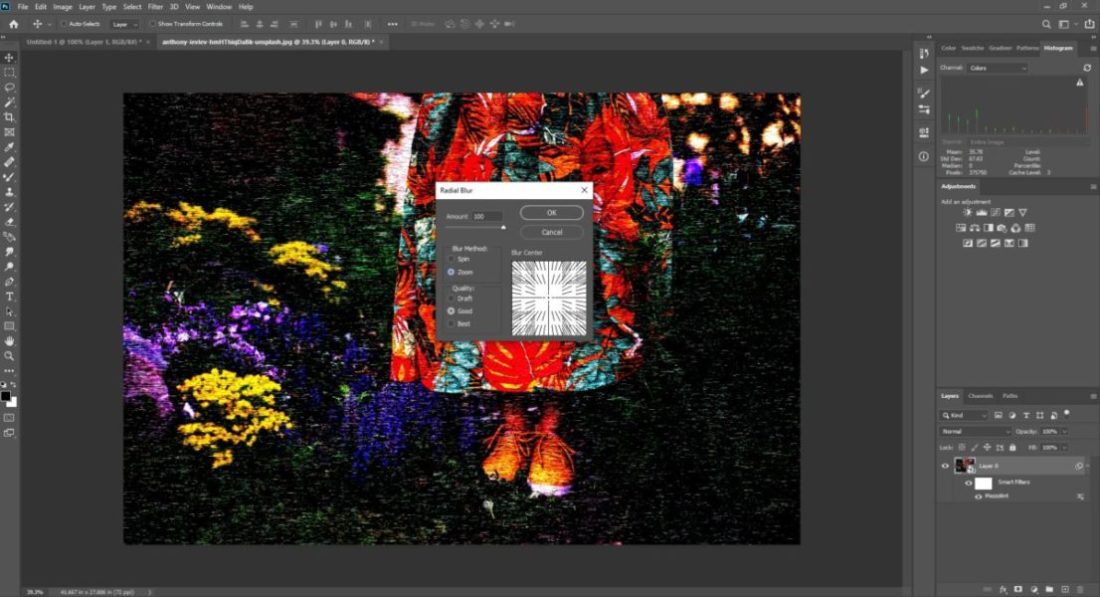
One more time. Filter > Blur > Radial blur.
The image should look something like a scene from a car that is speeding at a 1000km/hr or something like that.
But the lines which make the image now are still pretty straight, converging at the centre.
We need to twist them up a bit. Go to Filter > Distort > Twirl.
A dialog box would open. Let’s choose an angle of about 100 and press okay. The lines would now twirl around the centre of the frame.
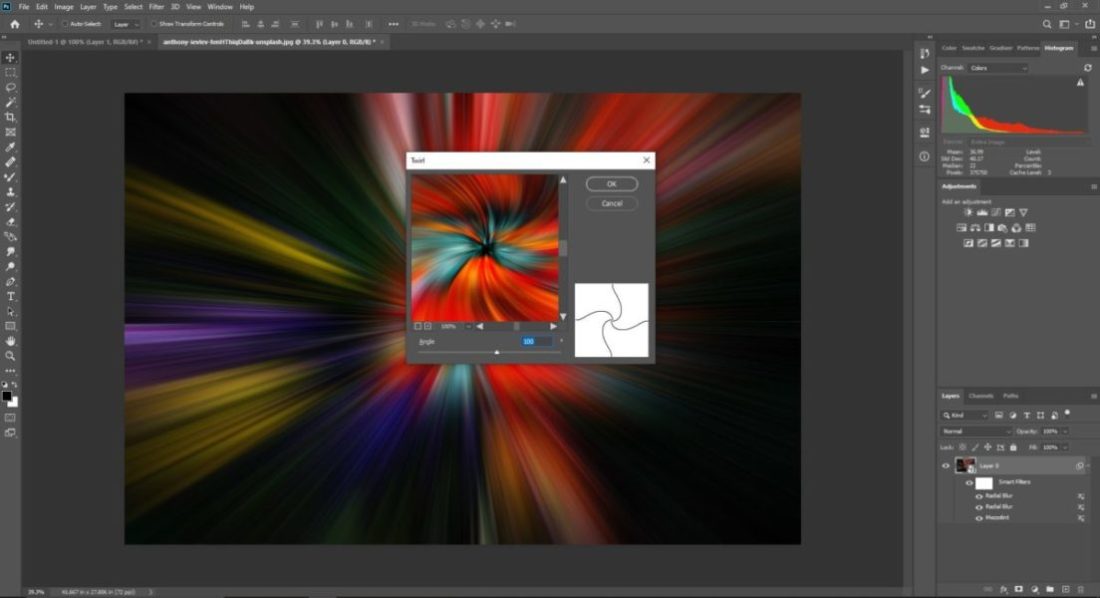
From here on, we are going to apply the twirl filter a few times using a different angle value for each instance.
To make each filter distinguishable and at the same time coordinate nicely with the previous one, we need to change the blending mode. I have a recommendation here. For me, Lighten works the best for this.
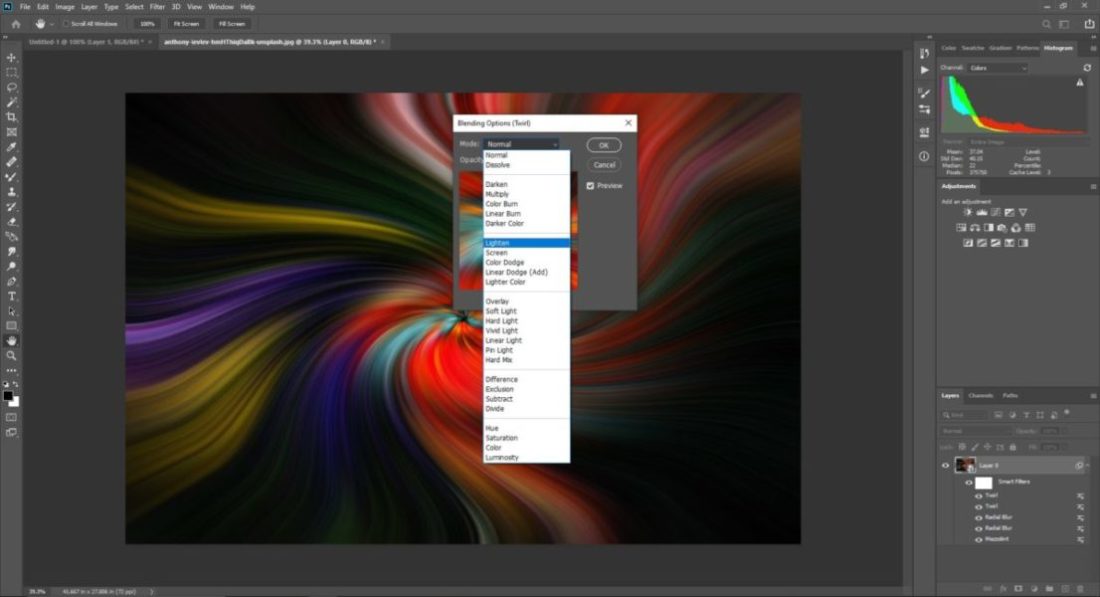
To change the blending mode of the filter, double click on the double line, up and down arrow icon next to the filter on the layers tab. Once the dialog box opens, choose lighten from the drop-down list.
So let’s apply another layer of the twirl effect. This time use an angle of negative 100 degrees.
Done!
You have your very own twirl, twisty light fiber image ready.
You can go back to ANY of the filters, play with the values, options, and quality, and see if you like it.

Final Touch Up
Like any other image, you can now edit this beautiful piece of abstract art, any way you want. I would suggest some brightness, contrast, and color balance adjustments.
Apply the adjustment using the adjustment layers so that they remain non-destructive.
Just play with the value until you like it. There are NO rules binding you.
That is it.
Wasn’t it easy?
Give it a try now. You don’t even need a good-looking image to make this. This is the photography version of the chef’s salad. Pour it in, and then keep mixing it till it changes beyond recognition.
Let me know how it turns out.
Keep shooting beautiful.
Hand Picked For You
 All you need to convert your old film negatives to photographs is a camera, the ...
- Instagram applies a blanket image compression algorithm to all images uploaded w...
- Horizontally-oriented images are a big no no for Instagram. Until now! Here is a...
- The Brenzier Method or portrait panorama is a simple technique used to incorpora...
- Removing people from your images is easier than you think and it takes less than...
- Moiré is an geometric artifact generally caused when trying to create a visual r...


![How To Remove Tourist From Your Photos Using Photoshop [Really Fast!]](https://sp-ao.shortpixel.ai/client/to_webp,q_glossy,ret_img/https://www.aperturebuzz.com/wp-content/uploads/2020/01/Image-of-a-girl-at-a-tourist-spot-in-India-without-the-people-around-300x200.jpg)

