Have you ever looked at those huge billboards hanging from the sides of buildings and wondered what camera took that mammoth image?
Once in the loop, have you even wondered how big can you print the images that come out of your own camera?
If the answer to both the above-mentioned questions is yes, then you are in the right place.
Today, we will discuss all you need to know to make a big #$$ print.
However, if you are in a hurry and just want to know the answer to the question, “how large can I print my image, you goddamn knucklehead?”
This is the answer.

If you are interested in how all the numbers in the infographic above were calculated, keep on reading.
But first, a short story to help me explain the concept better. Trust me this won’t take long.
The Magic Brick Wall
Okay now let’s dive in a little further and truly try and understand the process and concept behind printing images. I assure you once you understand the very basics, you will never need to consult anybody else, ever again.
That feels liberating, doesn’t it?
So let’s begin.
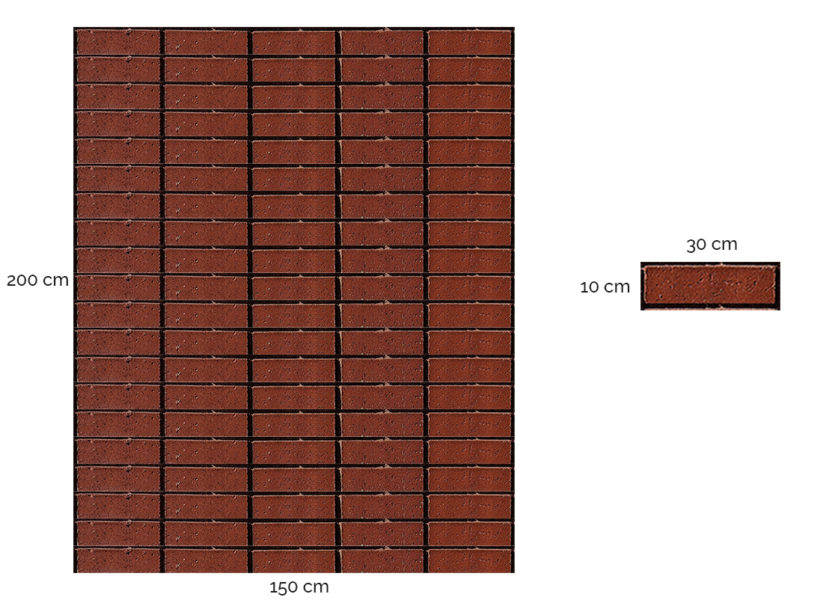
Imagine a wall made of bricks. Just one standing wall.
Only one thing to note about the bricks here, they are magical. Each brick can be enlarged or reduced in size.
Copy?
Now, suppose, we have hundred bricks for our use (this remains constant throughout the post). So, if each brick is of dimension 30cm by 10cm, we can build a wall that is 200cm high and 150cm wide.
The wall made of the magic bricks inherits the following property:
- Higher the number of bricks used in per unit area to make the wall, stronger it is and vice versa
This directly means that we can always make a larger wall but at the cost of the wall’s strength.
As I already said before, the bricks are elastic in nature, i.e., their size can be altered. So, if you want to make a larger wall with the same number of bricks (one hundred in this case), all you have to do is increase the size of each brick.
Instead of 30cm by 10cm, if the bricks are expanded to be 60cm by 20cm each, you can create a wall which is double the area of the previous one we made (400cm high and 300cm wide).
The only downside to this larger wall would be the strength of the wall.
Since the total number of bricks used to make the larger wall is constant at 100, we have now used fewer bricks in per unit area.
Using the same principle, we can also make a wall that is stronger than the original 200cm by 150cm wall. We just need to squeeze in more bricks than the original wall had in one unit area. In other words, simply reduce the size of each brick.
Just keep the above story in mind.
Application In Photography
I told you this tale of the magic bricks just to make my life a little easier while explaining to you the concept of pixel dimensions and resolution.
Read the following lines aloud now:
- Pixel dimension is the amount of data collected by the sensor of the camera.
- Resolution is the distribution of the recorded data per unit of area.
Think of the pixel dimension as the input material your camera is able to gather when you press the shutter button.
You press the button, the shutter opens and the sensor of the camera records a certain amount of data about the scene you are pointing your camera towards.
Resolution is the distribution of the captured data which would facilitate the creation of the image. Just hold on to this, for the time being, I will circle back to it.
The Granular Level
At the most fundamental level, each pixel is nothing but a data packet which has two crucial bits of information in it.
- The position value: Where it is located in the frame
- Color value: Representing the exact shade of color it represents
Say, we are using a camera that has a 10-megapixel sensor in it. This means every image the camera takes, the sensor is going to record the position and color value for 10 million pixels. Each time, every time.
These 10 million pixels, when placed correctly, make up the image.
This amount of data captured by the camera each time is constant, under ideal conditions. You cannot record more data about the scene with the same sensor. Think about the number of bricks we had in our example, the total number is fixed and constant.
Now let’s discuss resolution a little bit.
Resolution is the distribution of the data we recorded about the image.
What does that mean?
In the context of photography and printing, resolution is measured in terms of dots per inch (dpi) or pixels per inch (ppi).
Standard publishing resolutions range from 240dpi to 300dpi.
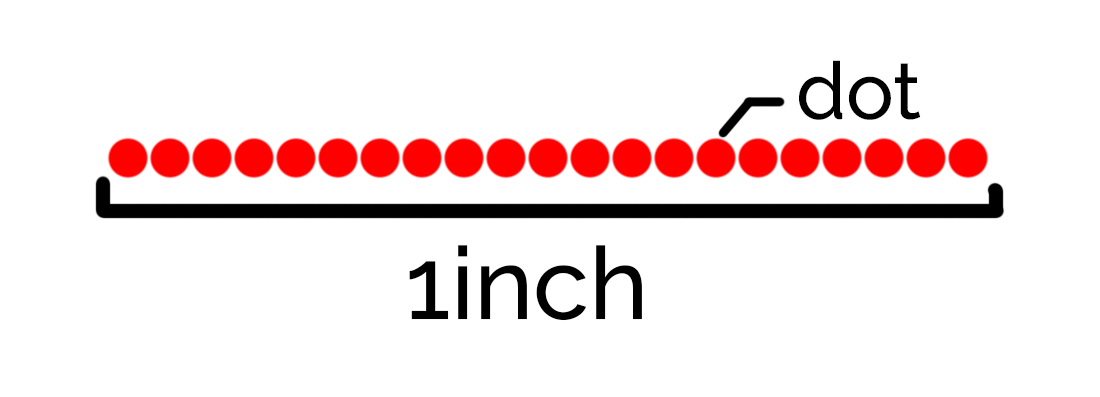
In simple words, the number of pixels we wish to stack together over the space of one inch.
Higher the number of dots we place in an inch, smoother the transitions of color are and cleaner the image looks.
One the other hand, if we place say only 15 dots per inch, each dot is going to be away from the other a considerable amount of distance and hence the edges may look jagged.
The entire concept is simply this. The camera acts as a recording device and records some data about the scene which can be used to recreate an image. The printer takes this recorded data and distributes it according to the resolution value and outputs a printed image.
How Big Can You Print?
The answer to this question depends on three primary factors:
- Pixel dimension
- Resolution
- Viewing Distance
We already discussed the first two. Let’s focus on the viewing distance for now.
Viewing distance refers to the distance between the image and the viewer.
For example, the viewing distance of an image printed on a magazine would be around one foot. That seems to be a good estimate of the distance between the eyes of the reader and the magazine.
Similarly for a billboard, the viewing distance would probably be at least a few hundred feet.
Why does viewing distance even matter?
The answer is simple really.
It is because human eyes perceive details differently depending on the distance.
The closer a subject is to the eye, the more details are visible and vice versa.
We can only make out the basic shape and color of a distant tree. But as we get closer and closer, we can make out more and more of the details. When sufficiently close, we can even easily make out the thin veins of the leaves.
This principle is equally valid for printed images.
If an image is only to be viewed from say a 100 feet away, chances are you can get away with much fewer details. On the other hand, images which are supposed to be looked at from an arm’s length, such as on a book, require the images to be much more detailed.
Makes sense, right?
“Perfect” Pixel Dimension
When we were talking about the amount of data our cameras are able to record for each image, we just assumed the maximum amount under ideal conditions.
The camera will try and record detail for all the 10 million pixels in our example every time you press the shutter, but the quality of the data recorded heavily depends on the settings used to take those images.
If you use any set of settings which results in an image being either under or overexposed, the data in the under or overexposed areas of the image may be completely unusable.
For a detailed discussion about how and why this happens, read: How To Best Use The Light Meter On Your Camera | Explained
Crop
Similar to under or overexposed areas of the frame, cropping the image also affects the available amount of data to create an image.
I don’t think this is coming as a surprise to anyone.
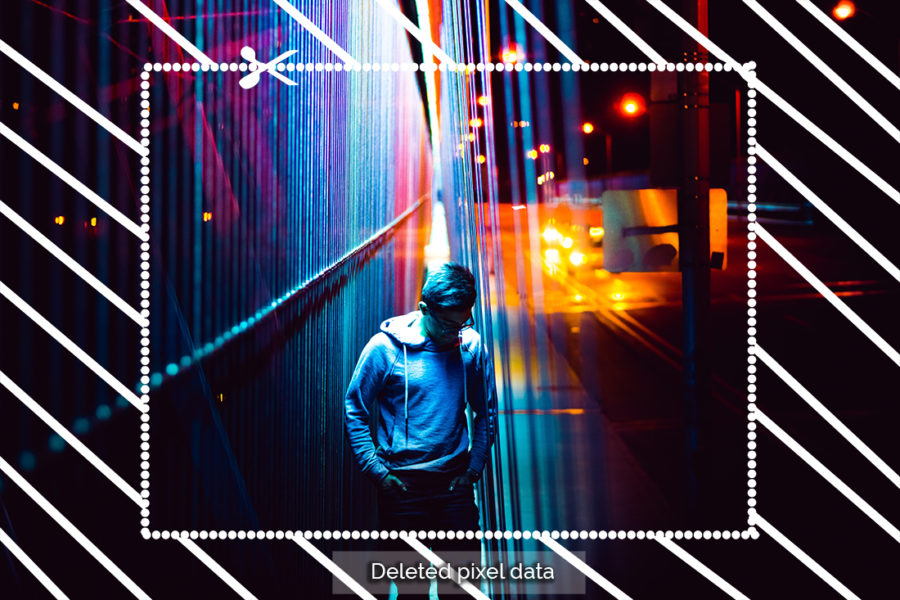
When you decide to crop a certain portion of the image, what you are actually doing is cutting out parts of the image. This is nothing but dismissing the data in the cropped out parts from appearing in the final image.
Since the amount of data is reduced from the original amount, the print you will be able to take will also be much smaller for the same resolution.
Best Print Quality Settings
If you do not want to waste any of the information your camera recorded and at the same time also do not want to “manufacture” new pixel data using algorithmic interpolation, your best bet is to use a resolution value of 300 dpi.
But remember to turn off ‘Resample’ if you are using any image editor.
As soon as you dial in the resolution value of 300dpi, your image editor or printing software will automatically calculate the size of the image you can print with the available pixel data.
Just print that size and you would be golden.
Printing at any higher resolution value would only result in you wasting your precious pixel data.
This is because of two primary reasons:
- Most printers cannot print at resolutions higher than 300dpi.
- Even if the printer can, any resolution higher than 300 dpi is virtually invisible to the human eye. Therefore it makes no sense in printing any finer.
Other Factors
Although the three primary factors on which the size of the prints depend on are Pixel dimension, Print resolution, and Viewing distance, there are a few other factors which also affect print quality and size.
Quality Of Printer
This is the obvious one.
The quality and type of the printer used to make the print does play a crucial role in making sure that the resulting print is of the highest quality.
For example, generally, inkjet printers produce better quality colored prints than laserjets.
Similarly, printers designed to print photographs on photo and archival sheets do a much better job than ordinary home printers.
And like I already said, the resolutions in which the printer can print also obviously does matter. So no matter how great the quality of the image you want to print is, if your printer is not up to it, you are not going to get the best results.
Algorithmic Interpolation
Most image editors such as Adobe Photoshop, Capture One, and Lightroom all come with the inbuilt functions to create ‘filler’ pixel data when the print size needed is larger than the pixel dimension.
Think of it this way.
When the amount of data is not enough to print a large size print at the current resolution, the software needs to create fake pixel data to feed the printer. Using a set of predefined rules which we are calling here the interpolation algorithm; the software calculates the number of pixels it needs to manufacture and then based on the values of the existing pixels, creates them.
It should be noted that the algorithms used to make new pixels are all different in different pieces of software. Depending on the image you want to upscale and the software you choose, your quality may vary.
If you know how image compression works and how various image file formats such as jpegs are used to make smaller image files, this is nearly the same thing in reverse.
If you do not know what I am talking about, you should definitely give this a read: Image File Formats | The Definitive Guide.
Quality Of Information
Ah! The one thing, at last, we photographers are overtly enthusiastic and obsessive about, SOC image quality.
I am sure that by now you know that all cameras which have the same megapixel count do NOT produce the same quality image.
Some times even if a camera in theory shoots using a higher megapixel sensor, it produces inferior results than cameras which shoot at lower megapixels.
Megapixels do not by any means ensure the quality of an image. It just represents the number of pixels an image is made up of and how large the resulting image can be blown up. A bad image (with less sharpness, clarity, quality) will invariably be a bad candidate to be chosen for printing big. Simple as that.
So try and pick a good quality image before you head on to the printers.
Oh, by the way, SOC stands for Straight Out of the Camera.
Print Surface
The type and texture of the surface on which the print is made also does matter.
In general, smoother the print surface is, more imperfections are visible and vice versa.
This means if you print the same image, one on a glossy paper and the other on a matte paper, the print on the glossy sheet will show more imperfections of the image if any.
Hence logic dictates, if the image you want to print is not so perfect, use the most textured material you have at your disposal to print on. It would be much more forgiving.
Good To Know
Resolution values like dots per inch (dpi) and pixels per inch (ppi) do not have any effect on the quality of the image when viewed on a screen. Two copies of the same image, one with 1dpi resolution and the other at a 1000dpi, will look exactly the same.
It only matters when the image is printed.
So, in case, you want to stop images you shared on various social media from being stolen, lower the file dimension of the image before sharing.
This will ensure that even if someone steals your image it would be virtually worthless to them; since if they decide to print it, all they will get are a few blobs of color on a sheet.
Conclusion
That’s it guys! That is all you need to know about large size prints.
The truth is a simple fact that all our modern cameras produce images which are fantastic in quality. You should have absolutely no problems with printing them in any size.
Forget the basic 5 x 7 inches or the larger 6 x 8 inches sizes, you can easily print huge poster-size images with absolutely no noticeable degradation in quality at all.
The relation between viewing distance and resolution is what makes life so much easier for us.
You see out of the three primary determinants of print size, pixel dimension is what remains constant throughout.
Resolution depends on the viewing distance. Shorter the distance, higher the resolution needed.
Since resolution and viewing distance are inversely related, we can very easily use files from cameras which have very little megapixel count and still get a respectable quality out of it.
If and only if we had to create large size prints which are to be seen from a close distance, will we need the big guns like the Canon 5DSR which has a ridiculous 50.6 MP sensor in it.
Till then you are golden with exactly the camera you have.
Keep shooting beautiful.
This is now a teeny tiny blog trying to compete with the big guys. If you liked what you read, please take a second to share it. It would help me a lot. Thank you.
