Shooting images with a silky smooth blurry background served with a generous helping of delicious bokeh has been a raging trend for quite some time now. And why would it not be? It makes the image look so much more “professional”, adds that right amount of classiness and makes an otherwise ordinary image standout from a heap of similar images that scream for attention.
Most people tend to think that to achieve such an exquisite look you need to invest a gazillion bucks in camera gear and lenses and only then are there any chances. These people would be the ones who do not know how light works and what exactly is the reason behind those blurry backgrounds. To tell you the truth it is pretty basic stuff.
So, does this mean that the gear is completely unnecessary and is not needed at all?
No. I would be lying to you if I said that those high tag camera bodies and lenses do not help to achieve that look at all. But that is all they do, they “help”. They are useful but NOT necessary (at least not always). They are indeed luxuries.
Let me give you an analogy to drive this point home.
Say you need to get to your home from your office. Now, you have many options at your disposal. You can take the bus, you can take a cab, you can drive your own Volkswagen. Or maybe you can get the new Ferrari 458 Italia (if you can even dream of buying that car) and zoom past the traffic to your house in no time.
Given an option which one would you take?
The Ferrari right?
Now think about the ‘why’? Why would you choose the Ferrari when all the other available option will most certainly get you the same result…..get you home. Why is it that you would choose the Ferrari first, then the car, then the cab and finally the bus?

Let me take a guess, because it’s faster, more comfortable, glamorous and let’s be honest who doesn’t want to own a 458 Italia even when it is just a dream?
It is more or less the same thing with the costly cameras gear and background blur. It is NOT the case that you cannot get the blur otherwise without using the costly equipment. You just want it more than you actually need it. Like the car, the cab and the bus there are many other ways, cheaper and affordable ways to get nearly the same result.
Here is how.
Basic Understanding
Before venturing into figuring out how to achieve the best possible background blur for your images I think you need to understand what the blur actually is and how it is caused. Don’t worry I won’t be too technical. Just the absolute basics that you need to know, to put your camera gear you already have available, to the best way possible use.
What Is The Blur, How Is It Caused?
Since we are delving deep into the subject I hope you have a basic understanding of the concept of depth of field. Just to reiterate, depth of field is very simply the amount of the image that is in reasonable focus. When almost all of the image is in focus, we call it a deep depth of field. Similarly, when a small part of the image is in focus we call it a shallow depth of field.
Let’s go then.
The blurry part of the background that we are discussing here is nothing but the part of the image that you as a photographer have chosen to EXCLUDE from the plane of focus. This means that you made an intentional choice to NOT have the background in focus thereby making it soft and blurry.

One important thing that you should remember at this point is that the amount of blurriness of an object grows exponentially as the distance between the object and the plane of focus grows. In other words, the further the object is from the plane of focus the blurrier it would be. Is there even a word called ‘blurrier’? Anyhow, you get the point.
Try the remember these two points that I just discussed. They will kick in later in this article.
All set then, let’s discuss the actual process of creating a beautiful blurry background with nearly any camera.
Use The Longest Focal Length You Can

Let us assume you have a kit lens for the purpose of this example, say the Nikkor 18-105mm f/3.5 to 5.6 VR. To wring out the maximum amount of background blur from your images you should use the longest possible focal length you have at your disposal. So in this case, if you have a Nikkor 18-105mm lens, use the lens at 105mm. Zoom it out to its maximum and then compose your shots accordingly.
Use the Smallest Aperture Value
The next important camera setting that you should care about is the aperture value. As you already know the smaller the aperture value the larger the actual aperture. So in effect, an aperture value of say f/1.8 or f/2.8 represent a substantially large aperture opening than say f/22.
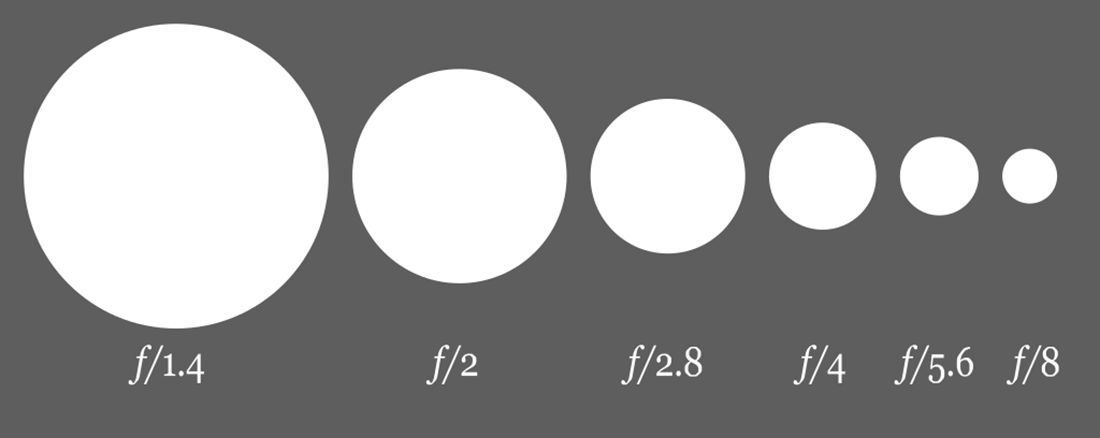
Now, a small aperture value (large aperture opening) also means that the resulting image will have a very shallow depth of field, ie, a very small part of the image is going to be in focus. This is uber important since all you want is just the subject to be in focus and everything else out of focus. If you select a larger aperture value say f/16 or so, the depth of field of the image will increase drastically thereby bringing everything in the frame in focus.
Everything in focus = No blurry background.
Just in case, if you had a hard time understanding the last part about aperture values and how that equates to the aperture opening sizes, I strongly recommend you to read Camera Aperture | A Comprehensive Guide For Beginners. It will clear out all the doubts you may have.
Maximize The Distance Between The Subject And The Background
Remember how I said earlier that as the distance between an object and the plane of focus increases, the blurriness also increases exponentially. This is exactly the phenomenon that you want to use to extract the maximum amount of background blur. Let me just simplify it further for you. Think of the entire frame as three components:
- Foreground
- Subject
- Background
What we are aiming to do is select the smallest aperture value we have so that the plane of focus is just enough to envelop the subject and no more. This will help us to throw both the background and the foreground into the ‘out of focus zone’ while keeping the subject relatively sharp and in focus.
Now, we want to maximize the amount of blur caused by increasing the distance between the subject and the background. This is just an extra latitude that you can use to intensify the blurriness if the background even more.
A smaller aperture value (larger aperture opening) does help in creating a small depth of field and hence keeping the unimportant foreground and background away from the plane of focus. However, it is almost impossible to make the effect pronounced enough so as to make it visible if there isn’t sufficient distance between the subject and the background.
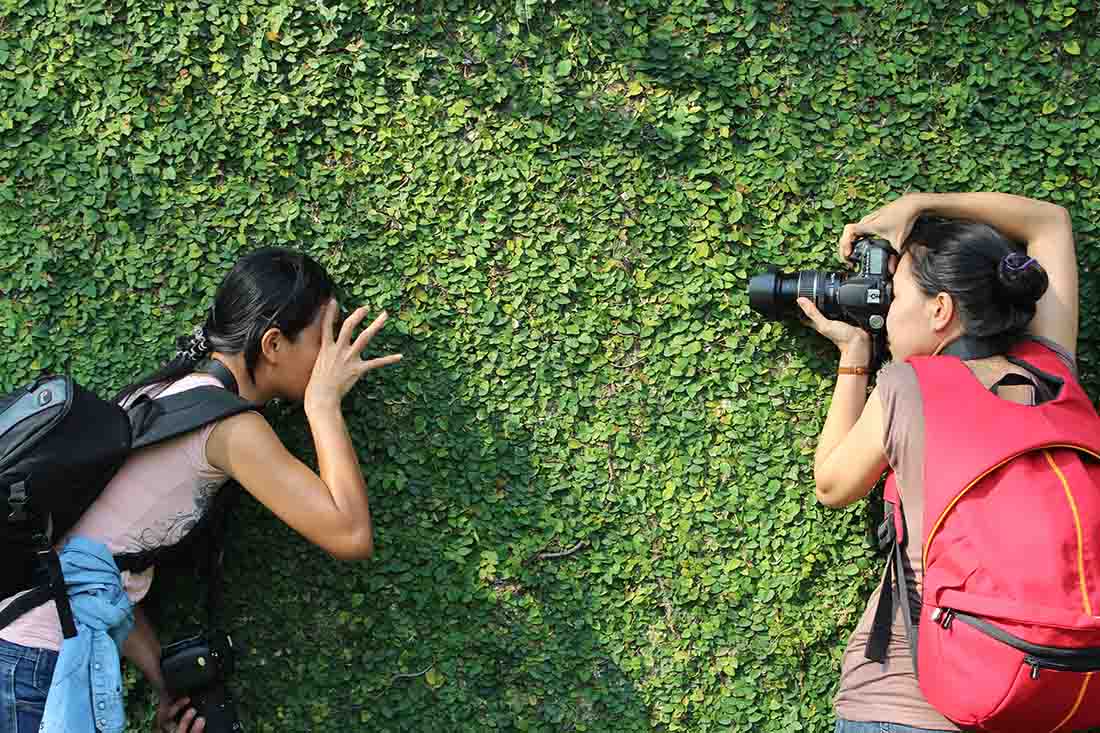
For example, say the subject is leaning on a wall or if there is something directly behind and very near the subject. No matter what aperture value you choose, however small, it would be virtually impossible to get the background out of focus and blurred out. Yes, you can select a small enough value like f/1.4 and just cover the eyes of the subject with focus and keep the wall out, but even then the wall or whatever the background will be very visible and discernable. There will be nearly no blur and the out of focus effect would be almost negligible.
Bonus Tip:
Sometimes when shooting in enclosed spaces like a room, it might be a problem to use this technique. Try and change the angle between the camera and the subject to maximize the amount of space you already have. If necessary reposition the subject or yourself to get as much space between the subject and the background as possible.
Minimize The Distance Between The Subject And The Camera
While being fully zoomed out on your kit lens get as close to the subject as possible. Just keep in mind that the composition of the image should not be hampered while doing this. Use your best judgment and get as close as you possibly can.
An important thing to remember here is to make sure you do not get closer than the minimum focusing distance of your lens at the particular focal length. The minimum focusing distance is usually mentioned on most lenses itself and if it is not, refer to your manual or look up the manufacturer’s website for details.
Blur Quality
This might sound a bit over the top and no so important but like every good thing, the devil lies in the details. You want a good, solid image at the end of the process that coveys the same message that you want it to right? The amount of blur that you derive using all the above tips and strategies that I just shared with you is important but that does not discount the quality of the blurriness.
What do you mean by “quality of blurriness?”

Let me explain.
If you photograph a subject using the process that I just enumerated above there is a pretty good chance that you will end up with an image that has a substantial amount of blur in it. By “quality of the blur” I mean its characteristics. How is the texture? What is its color? Is it bright or dark? Is it uniform or patchy? Does it have any discernable objects in it? All these things play an important role in how you photograph ultimately turns out to be.
Let me just give you a few pointers and you will be good to go.
- If possible always chose the background to be as uniform as possible. You might think that in the end it is going to end up looking like an indistinguishable patch and wouldn’t matter but it would actually. Try and anticipate how the background might look in the final image and always choose the most uniform piece of backdrop you can find. Choose a bush or a monotone wall instead of a busy road with shiny cars, that’s all.
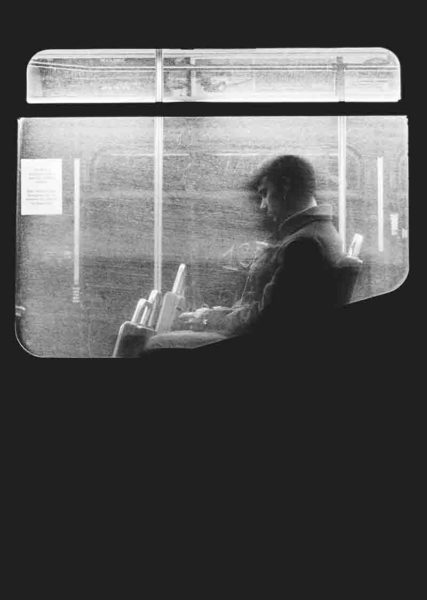
- Avoid bright spots as much as you can. If you are shooting in a relatively dark location and the subject is somewhat in the dark. Try and reposition yourself so that you do not have a brighter background. A background which is brighter than the subject itself is generally distracting and takes away from the image. Unless that is exactly the effect you are going for and it adds to the image. Avoid very bright uneven backgrounds as much as you can.

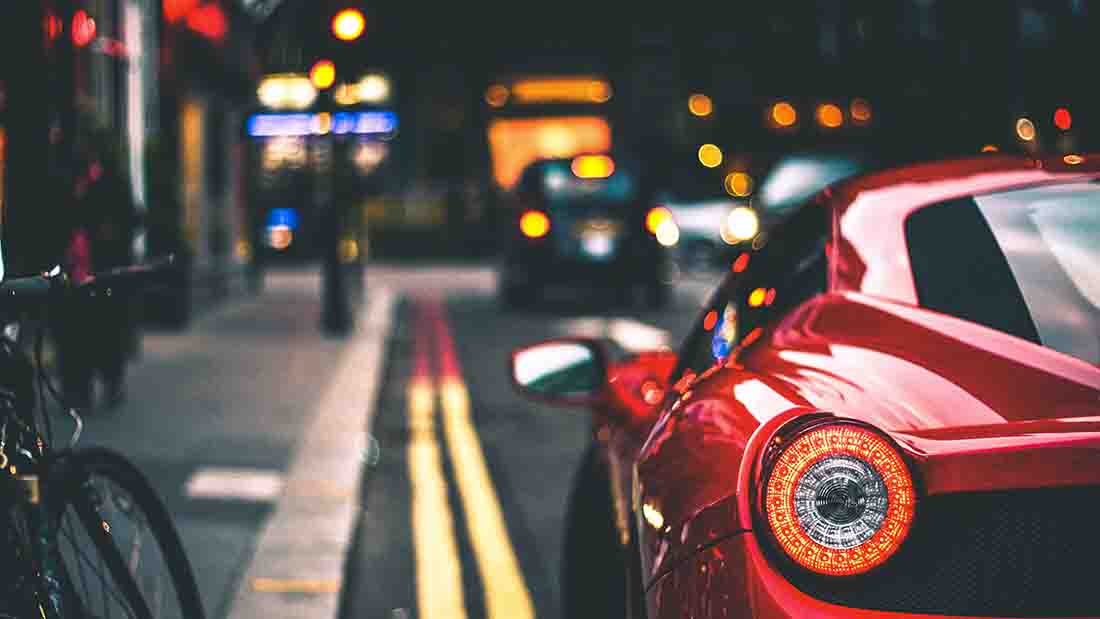
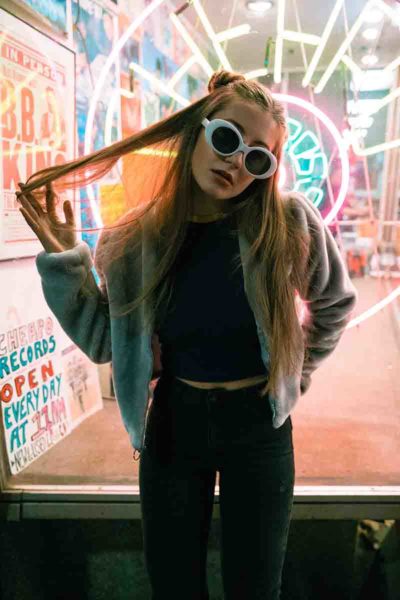
A Bad Example Of A Background. It Is Too Busy And Distracting - This is a general rule of composition that I learned from the great Henri Cartier Bresson which also applies here. Always try to preserve the maximum amount of contrast that you can between the subject and the background. In other words, do not shoot in such a way that the subject and the backdrop doesn’t have any contrast at all. Basically, do not shoot a man wearing a white shirt in front of a white wall.
- Eliminate stuff that may look distracting even when blurred out. For example, do not let a tree or a pole poke out of someone’s head or have some kind of writing or even have something which is too colorful and tries to grab attention from the subject.
Your subject is the one that you want to lay the maximum amount of emphasis on anything else that distracts the eye has to go.
Conclusion
When I started shooting for the first time (this is when I did not even have a good camera) the only way I knew to create bokeh and background blur was to make the aperture larger. It was much later that I learnt about all these various ways by which I can create more and intensify the resulting blur even further.
More and more people are also getting interested and trying to shoot such ‘professional grade’ images with even cellphone cameras. The demand for such products and features are quite clear when flagship phones like a Google Pixel or an iPhone X create a dedicated portrait mode which does exactly this. Just so you know the background blur that you achieve through software that these phones do are not real, per se. The camera just identifies the subject and the background separately and then just blurs out the background and sharpens the subject using some software.
I hope you have learnt some easy, affordable and actionable ways of getting the perfect blur for your images. The best part about all these tips is that you can apply them to virtually any camera. You don’t need a fancy DSLR or new mirrorless to do these at all. So, all done and dusted, go out there and get some nice pictures.
Keep shooting amazing.
Hand Picked For You
- Tilt-shift lenses are pretty much the closest thing we photographers have to pur...
- Depth Of Field is NOT fixed for a particular aperture value. This is a classic m...
- People live in fear of the Manual Mode all their life, never looking at it close...
- The Brenzier Method or portrait panorama is a simple technique used to incorpora...
- Understanding Autofocus Modes is crucial for you to master your camera and take ...
- Blurry images, photographs coming out too dark or too bright, inaccurate colors,...


