Video, video, video there really seems to be no end to it. Never in history has the world ever been as video hungry as today. YouTube, Twitch, online streaming, webinars, e-classes, you name it there is a video format for it. There also seems to be a real race to the finish line among the mainstream video streaming companies such as Hulu, Netflix, and Amazon Prime. As a cumulative result of all this, a huge amount of online and offline videos are made every day. Some are trash…I agree, but most of it is good.
Social media presence, especially having an Instagram and YouTube account now seems to be absolutely mandatory for everyone and everything. That applies even more so to businesses. Learning to use a camera to either make images or video is a seriously valuable skill to have right now. I have talked about making great images in many other articles here, in this one, I am going to talk about how you can start to make videos with the camera you already have.
So let’s get rolling…..
The Basics
A video is nothing but a sequence of images which are chronologically replaced at a certain rate synchronized with an audio track. At its very core that is what all videos are. It is just a bunch of images which are flicked through quickly creating the illusion of movement.
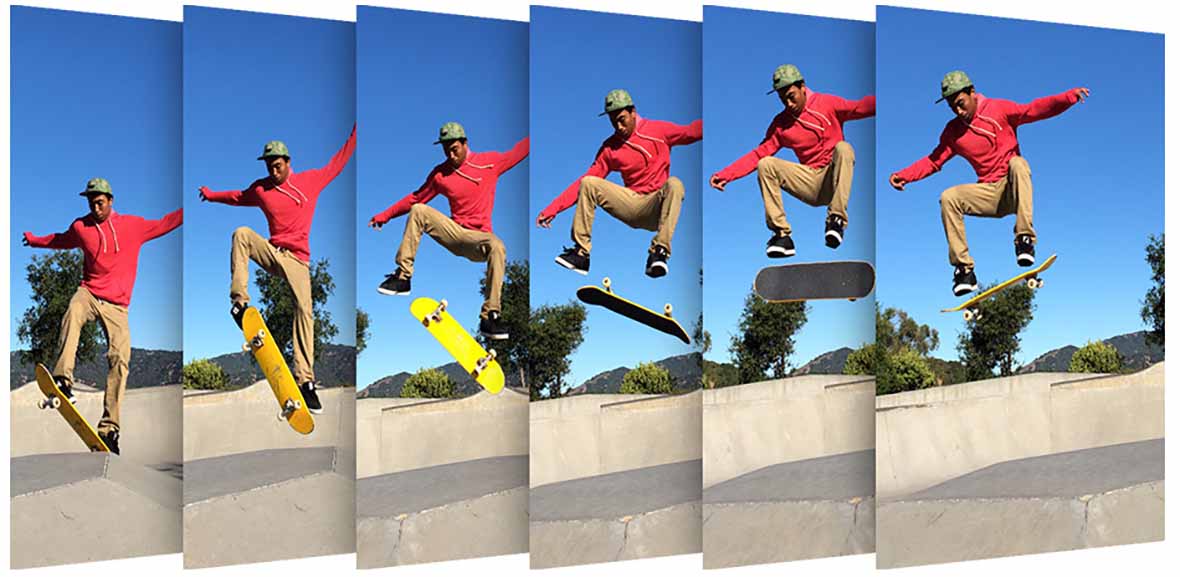
So just the way we think about a fraction of a second while making an image, when shooting videos we should always think in terms of movement. Movement of both the subject and the camera. A little planning and forwards thinking goes a long way.
Here are a few quick terms that you should know about.
Frame Size

This is exactly the same as in photography. Frame size refers to the resolution of the video that is recorded on the camera. 1920 X 1080 is regarded as Full HD or High Definition video. 4K is around 3840 × 2160. Higher the resolution, larger is the screen area you can spread the video without it losing quality. Most of the videos on YouTube are shot in Full HD 1920 X 1080 resolution. There is, however, a strong surge of 4K video now and most camera manufacturers are starting to offer this option on their camera bodies.
Frame Rate (FPS)
Remember I said earlier that a video is nothing but a bunch of images which are replaced at a certain rate synchronized to an audio track? This rate at which one image is replaced by the next is called the frame rate or frames per second. So if I say that a certain film was shot at 24 frames per second (fps), it means to record every second of the video 24 frames were used.
Seems like an awful lot isn’t it?
To understand more about why so many frames are needed you need to know more about the human eye or more precisely about one of its many characteristics called the persistence of vision. It is nothing but a fancy term for the refresh rate of our eyes, ie, the period of time an image stays before it is replaced with the next image. It is due to this particular phenomenon that we are able to “see” motion. Look it up you will be amazed.
To mimic the way the human eyes ” see” things we generally use 24 fps to record video. Broadcasting use 29 or 30 fps as a standard. If this is the first time you are about to shoot a video I would strongly advise you to stick to 24fps, you simply cannot go wrong with it.
Picture Profile
When shooting video you neither have RAW nor Jpeg image file formats at your disposal. Shooting using a neutral or flat picture profile is the best alternative that allows your camera to intake and preserve as much of the details as possible and also lend itself to a few post-production tweaks.
In simple terms, the picture profile is the list of adjustments made to the actual footage. So say if you bump up the contrast or the vibrance a little too much; the contrasty and colorful characteristics would be ingrained in the footage. Unlike still images, this would not be very easy to rid of later. The recommendation hence is to keep the footage untouched, with as little tweaks possible and take care of all these in the post when the footage is a lot more forgiving.
If you do not have a Flat/Neutral Picture profile available on your camera, just open up a typical picture profile and dial down the values to zero. Don’t forget to apply it then.
Shooting Time Limit
Most DSLRs, mirrorless and other compact cameras have some shooting time limit imposed on it. It is the longest duration of continuous video that you can shoot. In most cameras, it is set to 30 minutes, which should be sufficient for an average user. The time restriction is imposed to keep the image sensor within the temperature limit and not let it overheat. However, if you need to shoot a video sequence longer than 30 minutes you have to improvise a little.
A very easy and safe way to extend the shooting limit on Canon manufactured cameras is to use Magic Lantern. Not only will it extend the time limit it would also bring in a host of other amazing options which would make your shoot a breeze. Trust me, give it a try if you have a Canon camera. You can read all about Magic Lantern here: Magic Lantern | Unlock Your Canon Camera’s Full Potential For Free.
Audio
Sound is by far the most important yet the most overlooked aspect of filmmaking. Whenever a new camera body is announced you will see people pouncing on it and talking about resolution, autofocus, size, shape, weight, this, that and everything in between but almost never would you hear anything about the audio system in place. I don’t know why but people, in general, have this weird fascination about image quality and resolution but that level of focus and high powered vision is rarely extended to anything in the audio department.
I can assure you if I show you two identical clips, one with little-degraded image quality but good sound and the other with low-quality audio but stellar image quality, you would always want to see the clip with better audio.

Like I said, since many people do not care much about the audio quality anyway, you can avoid this HUGE mistake by just being a little vigilant and make your videos stand apart from the rest. To tell you the truth the internal microphone of most cameras (including higher end pro level bodies) have terrible audio. They are susceptible to a lot of distracting noise made by the camera itself and hence are not a good choice.
If you want to make good movies I suggest investing in a good external microphone. Don’t worry they are not that expensive. Rode and Sennheiser manufacture some excellent quality microphones that just attach to the hot shoe of your camera and all you have to do is plug it into the camera to switch out the internal mic. You can even use an external mic like the Zoom H4N to record your audio and them stitch it later to the video.
As you grow as a filmmaker and have more funds at your disposal you can upgrade your kit. Whatever you do, do NOT ignore the sound, it is what many a time makes or breaks a movie.
Focus
The most reliable and sure way to nail focus during filming a movie is to focus manually but it requires two things most new filmmakers do not have.
- A very sharp eye paired with good hand-eye coordinating to adapt to moving subjects.
- An extra person behind the camera to do the above.
Hence we are forced to fall back on AutoFocus. Right out of the gate I would say this even though I am a Nikon shooter, Nikon’s cameras when comes to video autofocus absolutely and truly sucks. The PDAF (phase detect autofocus) stops working the moment you switch on to Live View and all you have is Contrast Detect Autofocus which is terrible. Nikon if you are listening, please….for heaven’s sake please do something about this!
For certain Canon shooters, there is, however, good news. If you have a camera which has what Canon calls Dual Pixel Autofocus (DPAF) you need not look much further you are already in ‘perfect-land’. Never have I seen such seamless, smooth and perfect autofocusing in video. Canon found an excellent way to bring back PDAF into video shooting and that made all the difference. It seriously is a game changer. You can read about DPAF here: Dual Pixel Autofocus | Focus Like You Have Never Before.
However, if you are not in luck and do not have DPAF in your camera, don’t worry I have a few tricks that would help you out a bit.
Stationary Subject
Say if you are shooting an unboxing video and are at all times a certain distance from the camera. All you have to do is set up your camera on a tripod, frame your shot and then place something where you would be when in the frame and just focus on it. Once you are happy, switch off the Autofocus and you are done. Since the relative distance between you and the camera does not change within the period of the shoot, you are always in focus.
Deep Depth Of Field
Using a deep depth of field is also a very effective way to include everything in the focus range and thus allowing nothing to go out of focus. The downside is you lose a little aesthetic value since everything looks sharp and there is nothing in particular to draw the audience’s eyes.
To use this, all you have to do is choose a high enough aperture value such as f/16 or more. One important thing to remember here is that you would require good lighting conditions to do this. Since f/16 is such a small aperture opening, it allows a very little amount of light to pass through it. To know more about aperture values and corresponding opening sizes read Camera Aperture | A Comprehensive Guide For Beginners.
Shutter Speed
The speed of the shutter is largely dependent on the frame rate you chose in case of video. Yes, there is a connection between them, you cannot choose them independently. The basic rule of thumb is to select a shutter speed which is double the amount of the frames. So if we select 24 fps like we talked about earlier we should select 1/48th of a second as the shutter speed. Since in most cameras there is no 1/48th of a second shutter speed available, we use the closest alternative 1/50th of a second.
Just remember to double the frame rate and you will be fine.
Neutral Density Filter
Because you chose a relatively low shutter speed of 1/50th of a second now, there is going to be a problem. The problem is overexposing the video. In the world of photography and videography alike, 1/50th of a second is a heck lot of time. Owing to this long onslaught the sensor is flooded with a lot of unwanted light. But you are handcuffed to the same 1/50th of a second if you choose to shoot at 24fps. Furthermore, for a lifelike blur, you need to be at 24fps frame rate as well.
Seems like you are in a pickle now…can’t change anything eh…?!
Yes, it is true that there is not much latitude left in the settings department for you to change and control the light, however, there is one easy and extremely effective way to get out of this conundrum. If you cannot change the settings to do it, use a ND filter. Neutral Density filters are effectively like sunglasses for your camera. They are uniformly coated dark lenses which cover the front element of the lens and shade it from the extra light and glare. So the right amount of light enters the camera now and you get to keep all the optimum settings for yourself. Neat…ain’t it?
For a more detailed discussion read: Neutral Density Filters | All You Need To Know.
Stabilization
Just like in photography, a little stabilization is required to make the footage look good. In-Body Image Stabilization (IBIS), Optical Image Stabilization (OIS) or even Sensor-Shift are just a few forms of it. When it comes to stabilization, more is always merrier. A stabilized lens and some form of in body stabilization should cover you pretty well from all sides and give you a nice stable footage devoid of any jerks and shakes.
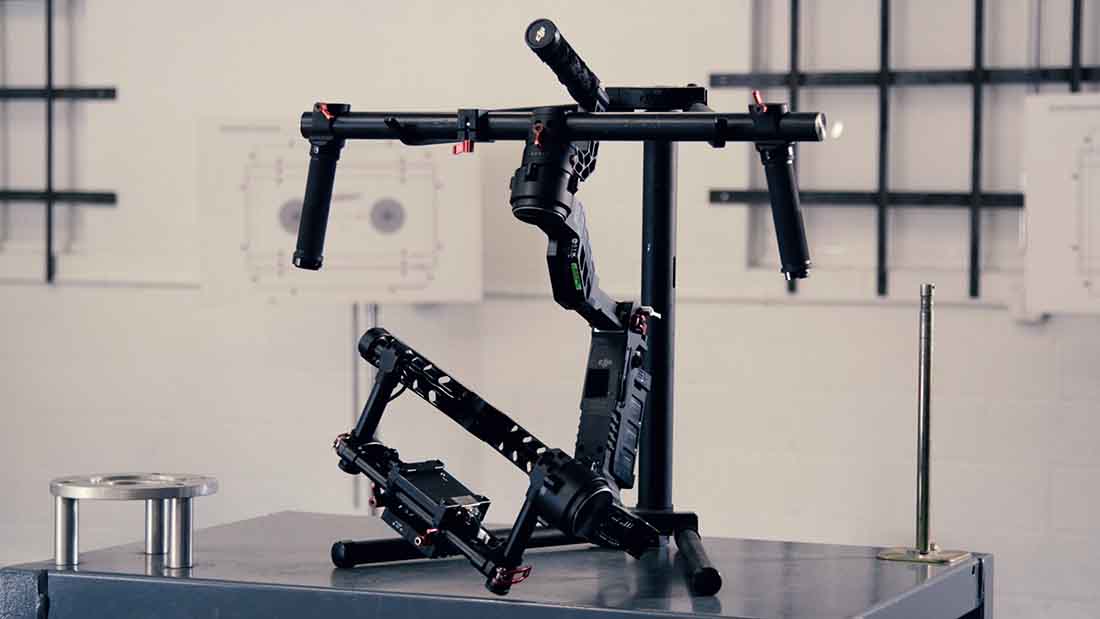
You can even use some external stabilizer like a gimbal or a steady cam if you can afford one. The good ones among them are generally on the pricey side.
If however you own an old camera or do not have a camera or a lens which has any form of stabilization try and use the tripod as much as possible. Even though the footage looks ‘okay’ on the LCD at the back when you are recording handheld on a setup which has no stabilization, it would definitely not be the same when you look at it later.
Nobody like jerky, like inside-a-salt-shaker video.
Lastly
- Auto White Balance works pretty well most of the time. Just set it and forget it.
- You can use AutoISO too but make sure you find out first what is the highest ISO that your camera can tolerate before the footage becomes all grainy and noisy. Limit the ISO range to that number and you will be fine.
- Avoid rapid zooming in and out. It gives people headaches.
- If you have amazing stuff like focus peaking and zebras on your camera use it….like ALWAYS. Some Canon users can use Magic Lantern to get these stuff for free on their cameras.
- For monitoring audio use the on-screen levels if you have them. While recording make sure they do not ‘peak’. Peaking is the audio equivalent of overexposing of an image.
- Occasionally try shooting from other the eye level. It may make for great angles.
- Shoot wide establishing shots, medium shots and close-ups then mix them up well in post to tell a good story.
- Before hitting record always check if the horizon is level and the background uncluttered. Composition is still the golden key in videography.
- There are no pixels to crop or the forever forgiving RAW to cut you some slack, so try and get it right the first time in camera.
- Don’t forget to shoot B-Roll shots of your subject.
- Finally, learn to be a good storyteller. Watch good movies, YouTube videos…whatever floats your boat. In the end what you strive to do through a video is tell a good, convincing story. The form just happens to be a movie, never forget this.
All that you require to start making movies are covered hence. If you still got some itchy questions, post them in the comments bar below and I will answer them for you. Keep on trying new stuff, build on the style of other good filmmakers just do not copy them blindly and label them as yours. If they can make their own mix of stuff so can you. Just give it some time and I am sure that in due time you will also have some seriously good films to show for.
Keep filming amazing!
