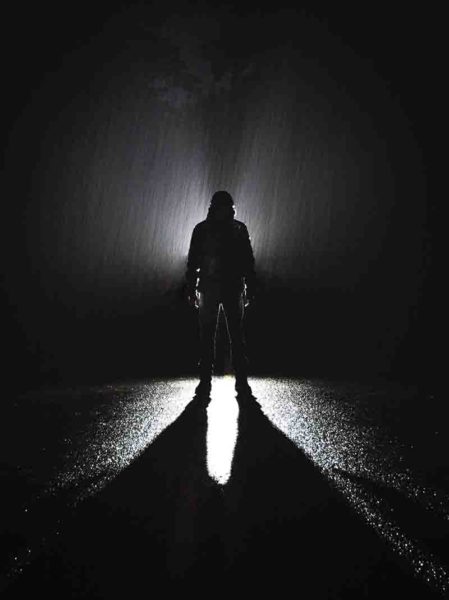
Silhouette photography is a genre of photography wherein a subject is photographed in front of a brightly lit background such that its outline becomes the prime subject matter of the image with a featureless interior, creating a sense of drama and mystery which adds to the overall mood.
In a way, silhouette photography is when less is more.
The photographer in this case actively reduces the number of discoverable elements in the frame to draw special attention to the elements which remain. This is very reminiscent of when shooting black and white images.
Many photographers, especially documentary and combat photographers swear by black and white images because they remove the bias of color and lay more emphasis on the actual content of the image. It helps to remove and reduce unwanted artifacts which may tantamount to distraction.
Light and Shadow
In my humble opinion, silhouette photography is nothing but a play of light and shadows. Yes, there is color involved but you may just as well shoot them in black and white and they would still look pretty impressive.
Let’s break down the concept of silhouette photography then and have a look at the unique individual characteristics.
- Bright, clean background
- Dark foreground and subject
- Distinct, recognizable subject with a strong outline
- No color, texture, tones or information of any kind about the interior of the subject recorded; just the outline
So, want to shoot some amazing silhouettes?
Let’s get to it then.
Here are a few steps to get you started.
Find A Bright Background
Now, this could be anything. Many photographers prefer to shoot early in the morning or late in the day when the sun is near the horizon creating a strong backlight. But there is absolutely no reason why you cannot choose any other light source other than the sun.
Bright window, stage lights, car headlamps all could potentially be excellent choices. Forget about the iterations, that really restricts your choices. Instead, focus on the main principle…. a bright background.
One thing that you need to keep in mind is to get a background which is as clean as possible. Avoid any clutter or otherwise distracting elements. Try and keep it as seamless and uniform as you can.
You may think that you would use a nice small aperture value and that would throw the background into a blur. Yes perhaps it would, but distinct shapes and objects like a lamp post, odd colored car, a neon graffiti would still show through.
Place Your Subject in front
Once you find a suitable background that compliments your subject well, position them properly.
Take your time on this.
The angle from which you shoot, the placement of the subject with respect to the light source behind, all add up to the look and feel of the image. You want to get this right.
If you managed to get a really clean background, good job! It would be easier for you now to place your subject. Since you would have a larger canvas to play with. However, if you just couldn’t eliminate a certain element from the frame, say like a tree in the background, make sure that the subject is NOT placed in front of it.
This is of paramount importance.
In silhouette photography, you should always think in a two-dimensional world. Your subject may have a lot of texture, colors, tones or depth but in the end, only the outline is going to show. If you have a tree in the background and you just happen to place your subject right in front of it, the silhouettes of the tree and the subject is going to overlap making the image look really bad.
The sole objective of this genre is to eliminate stuff to lay emphasis on the rest. The outline of the subject is all you have to play with. Your job as the photographer is to define it as well as you can and remove any such elements which can distort it and make it resemble something else.
Camera Settings
I think many people who are new to photography just assume that shooting a dark subject on a bright background (basically the opposite of any normal image) is going to be a challenging affair. Let me assure you, it is absolutely NOT.
The most you have to do is probably set the exposure yourself or meter a certain part of the image.
Let me explain.
Any modern digital camera which has a dedicated light metering system (which is all of them) is programmed to take images of exactly the opposite kind of what we want here. The subject is always prioritized and all the other changes revolve around it.
Let’s take an example. Say we are shooting a person standing on the beach at sunset.
If we allow the automatic exposure systems of the camera to run as they want, they would identify the man as the primary subject. And since he would be extremely dark in comparison to the sky and the sun behind him, the camera would increase the exposure to expose him properly.
In this quest of exposing the man properly, in all probability, the camera is going to overexpose the entire image especially the background. It would be all washed out, white, without any discernible details or textures.
NO, that is not what we want here.
There are two primary ways to shoot the person as a silhouette.
- Take total control of the camera. Shoot on Manual Mode.
OR - Trick the camera to underexpose the subject.
Manual Mode
Shooting in Manual Mode does require practice and a basic understanding of the exposure triangle. I wouldn’t recommend it if you are a beginner.
Having said that it isn’t that hard to shoot silhouette images using the Manual Mode, in this case.
Out of the three primary settings (aperture, ISO, shutter speed), you can pretty much keep the aperture value and the ISO constant and play with only the shutter speed to get the desired result.
An aperture value of f/8 is a good place to start. It gives you a substantial amount of depth of field and also a bit of background blur if the background is sufficiently far enough. As of the ISO, set it to ISO 100 and forget about it.
Mastering the shutter speed is the main trick here.
Your sole objective is to expose the image for the background (which is pretty bright) which would automatically underexpose the subject in front of it. You may start with a shutter speed of about 1/250th of a second and then adjust it as necessary.

A useful tip here would be to use the image histogram to make sure that you don’t go too far with either the highlights or the shadows in the image. Yes, you need the subject to be dark and comprise only the outline but if possible try and preserve some details. If would make your image look much better and aesthetically pleasing.
For a detailed description of image histograms and how you can use them to nail your exposure perfectly, read: How To Leverage Histogram Explained | Plain & Simple.
Tricking The Camera
Like I said earlier, nearly all of our modern digital cameras are programmed to give the utmost priority to the main subject of the image. All the other aspects like the background, foreground, etc are secondary in nature.
So if the camera finds a person in the frame it would try all its might to expose for it properly and think about the rest later. This would almost certainly blow out the background (in this case) and make it look like a giant white wall.
When I say “tricking the camera” I mean using the camera’s intelligent processors to expose the image but tailor it to do what we want.
Here is how to do it.
It really does help if you have your camera set up to use the Back Button Focus Method. It is nothing but just reprogramming a button at the back of the camera to be used as the AutoFocus button. Instead of the half-pressed shutter, you can use the newly assigned button to focus.
Read Back Button Focus | Control Your Autofocus Like You Never Have to know why you may want to do this. I know, it does seem like over complicating things for no reason but trust me it is NOT! Once you start using it, you would understand why I am saying this.
Irrespective of whether or not you use BBF, you can use the following steps to set up your exposure to capture a beautiful silhouette.
- Dial in your aperture value (f/8) and the ISO (ISO 100)
- Now position your subject and use the autofocus of the camera to focus on it. Alternatively, you can also manually focus, in which case skip the next step
- Once you acquire focus, turn off the autofocus on the lens. This is important.
- Set your light metering to spot metering
- Now frame your image and use the joystick or the D-pad on the back of the camera to position the autofocus point on the brighter part of the image. This is essentially the “tricking”.Since we no longer need the camera to focus, we now use the AutoExposure function to set the exposure. By placing the autofocus point on the brighter part of the frame, we are essentially directing the camera to sample that region only and expose for it. Doing that would automatically underexpose the subject and you would have a beautiful silhouette image.I should, however, let you know that the above method doesn’t work on the Auto Mode.
Post Processing
Now that you have an amazing image to yourself, all you have to do is just polish it up a bit.
This is totally what you want and how you want your image to look like. You can increase the vibrance and the saturation a bit or you may even turn it into a grayscale image. Pumping up the contrast a notch and making sure that the subject is well balanced with the rest of the image is advisable.
If you bracketed your shots, now would be the time to combine them together and mix them well to find the perfect balance.
Use your favorite post-processing software to paint your imagination on your own silhouette image.
Tips
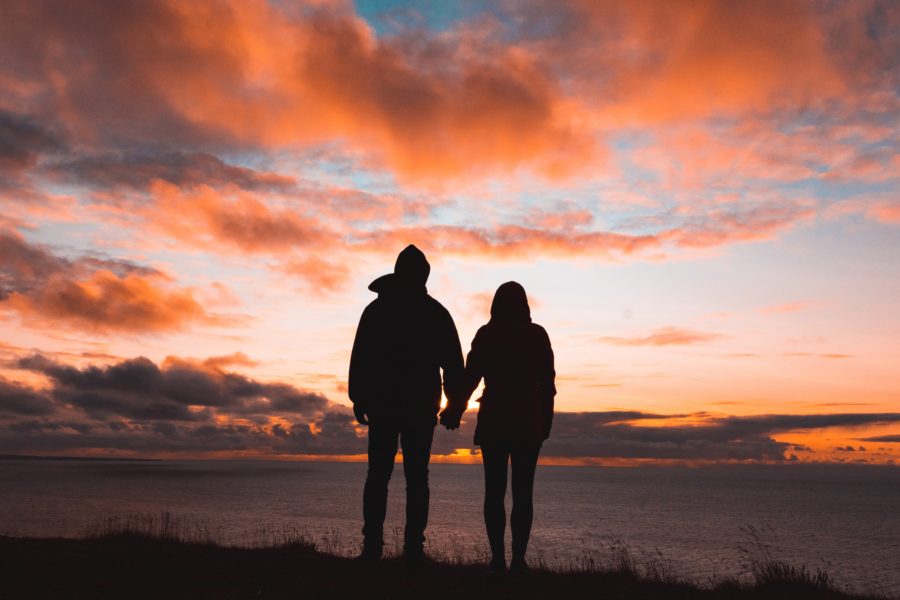
- If you have multiple subjects or elements in your background, make sure that you space them out. Since only the outer periphery of the elements would be visible, it is of extreme importance that you keep them from overlapping. Maintain distance and do not let one element merge with the other. The outlines should be readily recognizable, strong and discernible.
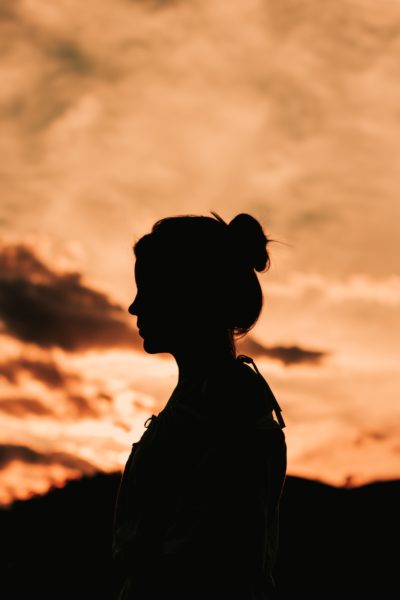
- Shooting people in profile rather than face on or back gives a better definition to their shapes.

- NEVER use the flash!
- If you have a strong backlight source (like the sun), you may want to hide it behind the subject’s body to keep it from overpowering the image.
- Partial silhouette images where a part of the subject is visible and the rest in the shadows also look great. Give it a try.
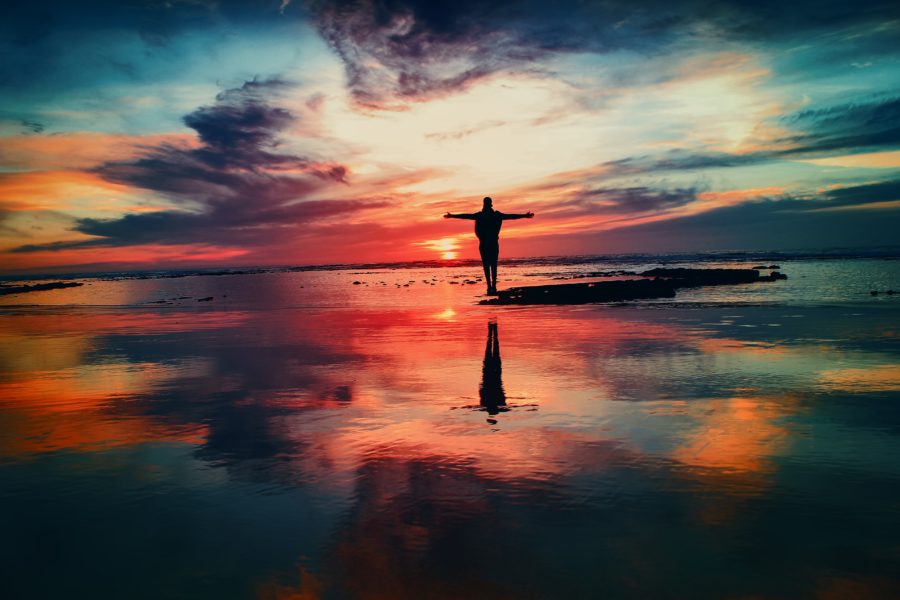
- Location and the time of the day matters if you want to shoot silhouette images with natural elements. Sunrise and sunsets most obviously lend themselves beautifully to this genre of photography.
- After you have mastered static subjects, you can also try dynamic shots with moving subjects.
- You can use reflections and smoke to add that extra oomph to the image.

That is all you needed to know about shooting silhouette photography. Shoot me any questions below if you still have them. I would get back to you as soon as I can.
So, go out there and bring back a ton of light and shadows.
Keep shooting amazing.
This is now a teeny tiny blog trying to compete with the big guys. If you liked what you read, please take a second to share it. It would help me a lot. Thank you.
